A cluttered fridge can make even a well-planned kitchen feel disorganized. Food gets pushed to the back, leftovers are forgotten, duplicate groceries find their way into the shopping basket, and everyday cooking becomes more frustrating than it needs to be.
The good news? You don’t need an expensive refrigerator makeover to fix it.
With a few inexpensive containers, a practical storage system and a little weekly maintenance, you can create a fridge that looks beautiful, keeps food easier to find and helps reduce unnecessary food waste.
The secret is to organise around how you actually use your kitchen, rather than buying every matching container you see online.
Whether you have a compact apartment fridge or a larger family refrigerator, these budget-friendly fridge organisation ideas will help you create a cleaner, more functional space without overspending.
1. Start With a Fresh, Clean Fridge
Before buying storage accessories, start with what you already have.
Take everything out of the refrigerator and place perishable food somewhere appropriately cold while you work. Check food dates, discard anything that is no longer safe to keep, and group similar items together.
Next:
- Remove shelves and drawers if your refrigerator manual allows it.
- Wash removable parts with warm, soapy water.
- Wipe the interior, corners and door compartments.
- Dry everything thoroughly before replacing the shelves.
- Check food packaging for leaks, spills or damaged seals.
This first step is important because organising around old spills and forgotten food only creates more work later.
Budget tip: You don’t need specialist cleaning products. A clean cloth, warm water and mild dish soap are usually sufficient for routine cleaning. Follow your refrigerator manufacturer’s cleaning instructions.
2. Understand Your Fridge Zones
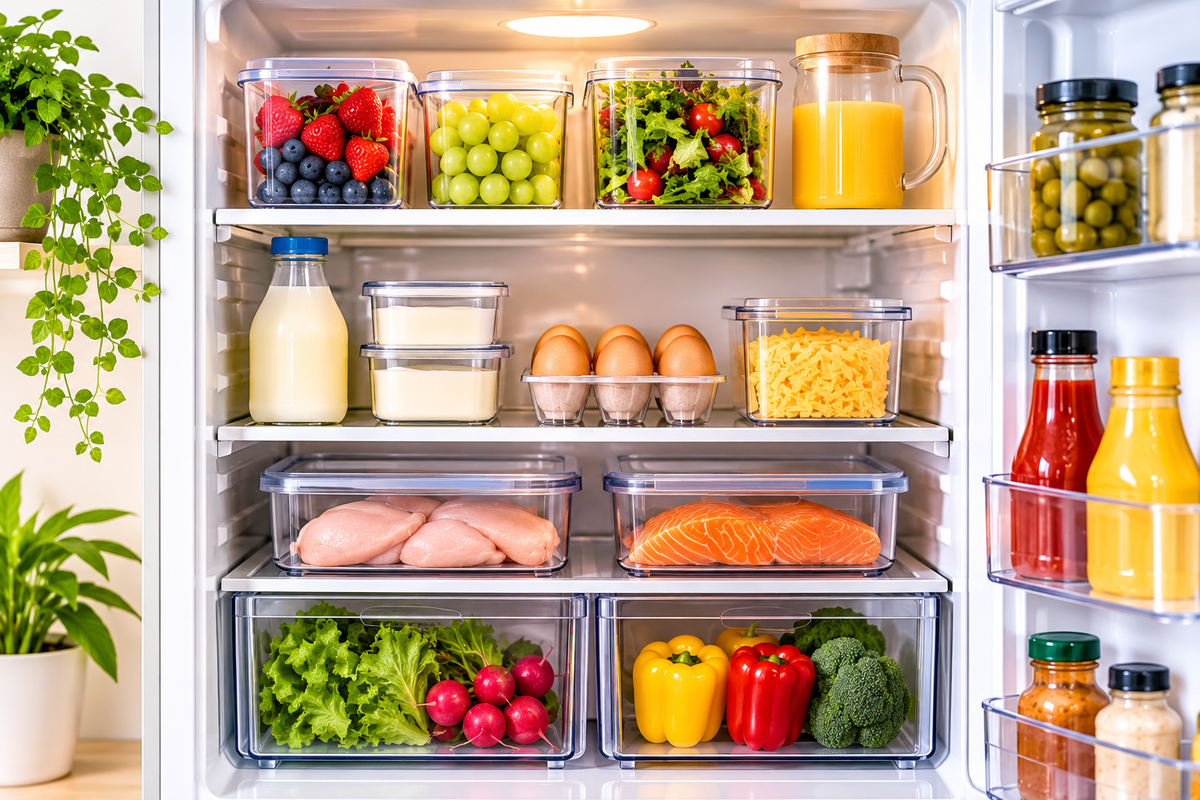
One of the easiest ways to improve refrigerator organisation is to give different food categories designated spaces.
A consistent arrangement makes it easier to find ingredients, return groceries to the correct places and notice what needs using.
Here is a practical starting point:
Upper shelves: Ready-to-eat foods
Use the upper shelves for foods that are already prepared or do not need further cooking before eating.
Examples include:
- Covered leftovers
- Ready-to-eat snacks
- Prepared ingredients
- Drinks that need refrigeration
Middle shelves: Everyday essentials
Keep frequently used items together so they are easy to reach.
Depending on your refrigerator layout, this could include:
- Dairy products
- Eggs in their original carton
- Cheese
- Yogurt
- Opened foods that require refrigeration
Lower shelf: Raw meat and seafood
Keep raw meat, poultry and seafood in sealed, leakproof containers. A tray can provide an additional barrier against drips.
Placing these items low in the refrigerator helps prevent their juices from contaminating ready-to-eat foods.
Crisper drawers: Fruits and vegetables
Use the drawers for fresh produce and follow any humidity guidance provided by your refrigerator manufacturer.
Some drawers are designed to retain more moisture for leafy vegetables, while others provide conditions better suited to certain fruits.
Avoid overcrowding the drawers, and remove spoiled produce promptly.
Refrigerator door: Condiments and sauces
The door is generally a warmer area because it is exposed to temperature changes whenever the refrigerator opens.
Use it for suitable condiments, sauces and other products whose labels recommend refrigerated storage.
Avoid making it the main storage location for particularly temperature-sensitive foods such as milk.
A useful safety reminder: Keep your refrigerator at or below 40°F (4°C), using an appliance thermometer to check the actual temperature. The arrangement of shelves can vary between refrigerator models, so follow your appliance instructions and food packaging guidance. The USDA provides additional advice on safe refrigerator storage.
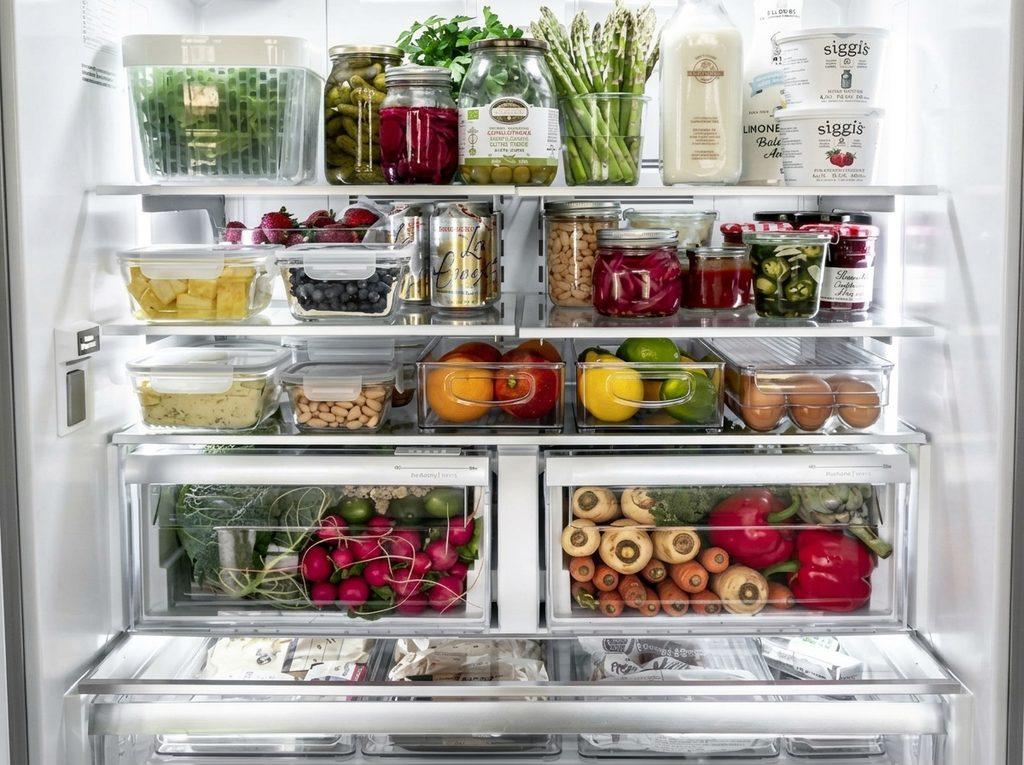
3. Use Clear Storage Bins to Create Order
Clear refrigerator bins are among the most useful accessories for creating an organised fridge.
They allow you to group similar items without hiding them behind other groceries. Instead of moving several containers to reach something at the back, you can pull out an entire category.
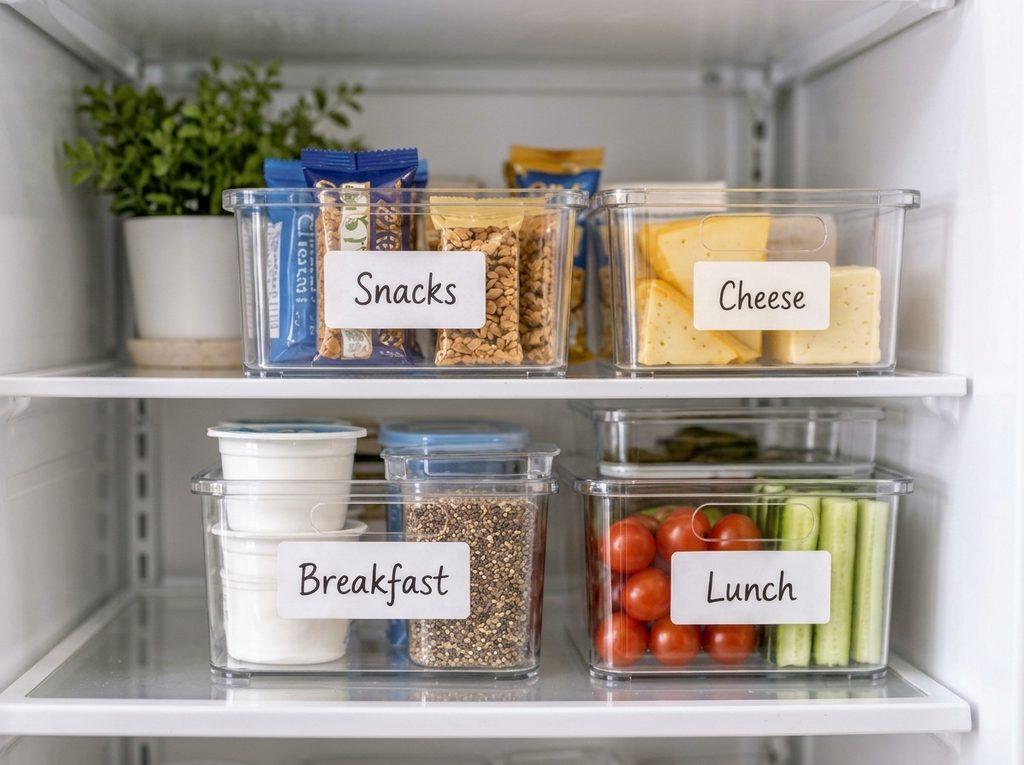
Consider creating these simple zones:
- Breakfast bin: Yogurt, spreads and breakfast ingredients.
- Snack bin: Individually packaged snacks and suitable ready-to-eat foods.
- Cheese bin: Packaged cheese and other related products.
- Lunch preparation bin: Ingredients you regularly use for packed lunches.
- Use-first bin: Food that needs attention before you buy more.
You don’t need a separate container for every food category. Start with one or two bins and see which areas would benefit most.
Budget tip: Before purchasing new organisers, measure your shelves and check whether you already own suitable food-safe containers. Repurposing containers you have at home can be more economical than buying a complete matching set.
4. Make Better Use of Deep Shelves With a Turntable
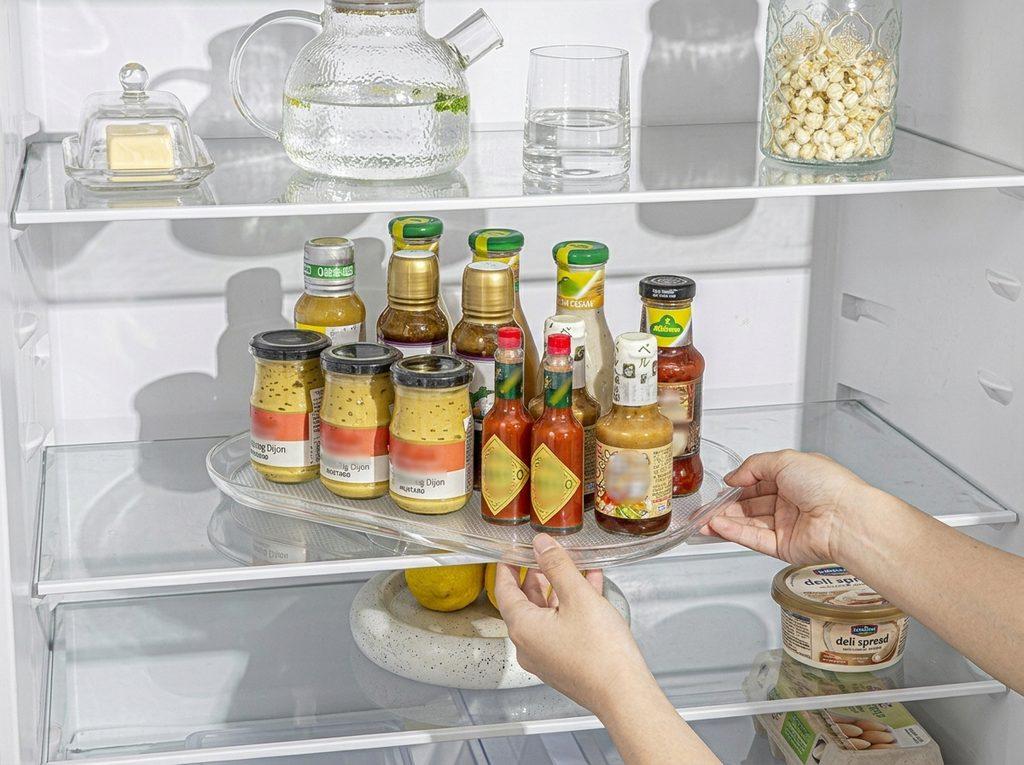
Deep refrigerator shelves can create a familiar problem: small jars and bottles disappear behind larger items.
A small turntable, sometimes called a lazy Susan, can make these spaces easier to manage.
It works particularly well for:
- Sauces and dressings
- Small jars
- Condiments
- Frequently used bottles
Instead of reaching behind everything, simply rotate the turntable to bring the item forward.
Before purchasing one, measure the available shelf width and depth. Check the height as well, especially if the shelf above cannot be adjusted.
A turntable is helpful, but it isn’t essential. If it doesn’t fit your refrigerator, a shallow open bin can achieve a similar result.
5. Add a Few Space-Saving Accessories
The most effective fridge organisation systems are often surprisingly simple.
You don’t need a refrigerator full of accessories. Choose only the items that solve a genuine storage problem.
Here are a few affordable options:
Can dispensers
These keep canned drinks together and can make them easier to access in a crowded refrigerator.
Stackable storage bins
Stackable bins can help make use of vertical space, provided they fit securely and don’t obstruct airflow.
Shelf risers
These create an additional level for suitable lightweight items and can make tall shelves more functional.
Drawer dividers
Small dividers help separate produce or packaged items so they don’t become one crowded pile.
Egg containers
An egg holder can provide a neat storage option, although keeping eggs in their original carton is also perfectly practical.
Before buying anything: Measure your refrigerator, check shelf height and consider whether the accessory will make everyday access easier. A storage product that looks attractive but doesn’t fit properly is not a good investment.
6. Create a Coordinated Look Without Spending Too Much
An aesthetically organised refrigerator is not necessarily an expensive one.
The visual difference often comes from consistency rather than the number of products you buy.
Try these simple ideas:
Choose a limited colour palette.
Clear containers, white labels and neutral accessories can create a clean, coordinated appearance.
Use similar containers where practical.
You don’t need everything to match perfectly. Even two or three matching bins can make a noticeable difference.
Keep labels simple.
Use short labels such as:
- Snacks
- Breakfast
- Cheese
- Drinks
- Use First
Avoid overcrowding.
An attractive fridge needs some breathing room. Leave enough space for cold air to circulate around stored food.
Keep frequently used items accessible.
A beautiful arrangement is only useful if you can maintain it. Place everyday ingredients where they are easy to reach.
Remember, the goal is a fridge that looks organised because it functions well, not one that requires constant rearranging to maintain its appearance.
7. Label and Store Food Thoughtfully
Labels can make a significant difference, especially when several people share the same refrigerator.
They help everyone understand where items belong and reduce the likelihood of food being forgotten.
For leftovers, label containers with:
- The name of the food
- The date it was prepared or stored
Use transparent, food-safe containers where possible so you can see what is inside.
You can also transfer suitable foods into containers when doing so makes them easier to store. However, don’t remove original packaging if it contains important storage instructions, expiry information or allergen details.
Keep food covered, and follow the storage directions on its packaging.
A simple labelling system is particularly helpful for busy households where groceries are purchased and prepared on different days.
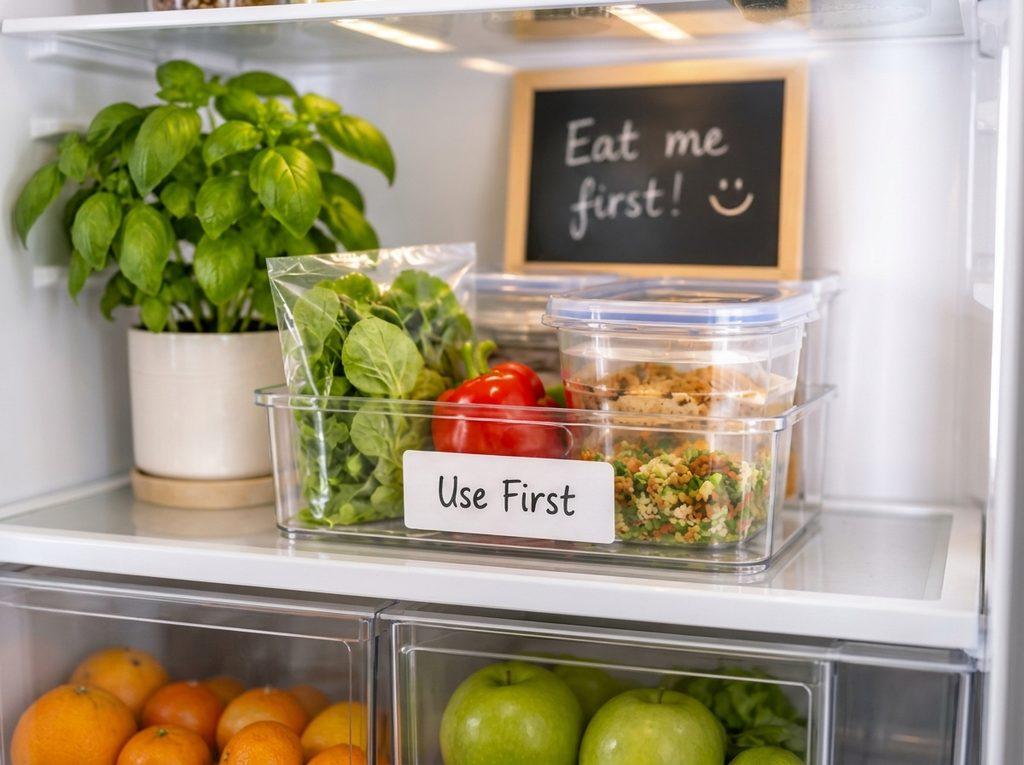
8. Introduce a ‘Use First’ Section
One of the best ways to reduce food waste is to make food that needs attention easy to see.
Create a small designated area for items that should be used before opening newer products.
This could include:
- Leftover vegetables
- Opened food approaching its recommended use date
- Prepared ingredients
- Suitable leftovers
Place the section somewhere visible and check it before planning meals or writing your grocery list.
The idea is simple: make the food you already have easier to remember.
This small habit can help prevent unnecessary purchases and make weekly meal planning more practical.
9. Follow a Five-Minute Weekly Fridge Reset
Even the best refrigerator organisation system will become messy without a little maintenance.
Fortunately, you don’t need to spend hours reorganising everything.
Set aside five to ten minutes before your next grocery shop to:
- Check the contents of your refrigerator.
- Remove food that is no longer safe to keep.
- Wipe up spills.
- Move suitable older items towards the front.
- Check the use-first section.
- Make a shopping list based on what is actually missing.
Store leftovers in covered, shallow containers and refrigerate them promptly. As a general USDA guideline, refrigerated leftovers should be used within three to four days or frozen for longer storage.
Try to refrigerate perishable food within two hours of preparation or purchase, and sooner in very hot conditions.
A regular reset prevents small organisational problems from becoming a full refrigerator makeover every few weeks.
Budget-Friendly Fridge Organisation: What Should You Buy First?
If you’re working with a limited budget, resist the temptation to purchase an entire refrigerator organisation kit.
Start with the items that solve your biggest problems.
| Priority | Item | Why it helps |
|---|---|---|
| 1 | One or two clear bins | Groups frequently used foods |
| 2 | Food-safe storage containers | Keeps leftovers covered and organised |
| 3 | Simple labels | Makes food categories easier to identify |
| 4 | Refrigerator thermometer | Helps monitor safe storage temperature |
| 5 | Shelf riser | Makes suitable vertical space more useful |
| 6 | Turntable | Improves access to items at the back |
You can add accessories gradually as your needs become clearer.
The best investment is not necessarily the most attractive product. It is the one that makes your refrigerator easier to use every day.
Frequently Asked Questions About Fridge Organisation
How do I organise a small fridge?
Start by grouping similar foods together and assigning each category a specific area. Use one or two clear bins, store suitable items vertically where possible and avoid overcrowding. Keep frequently used ingredients accessible and make a little space for food that needs using first.
What is the best way to organise a refrigerator?
A practical refrigerator organisation system separates ready-to-eat foods, raw ingredients, dairy products, produce and condiments. Use the available shelves and drawers according to your refrigerator’s design, while keeping raw meat and seafood safely contained to prevent drips and cross-contamination.
Where should eggs and milk go in the fridge?
For refrigerated eggs, keeping them in their original carton on an interior shelf helps protect them from temperature fluctuations. Milk is also better kept on an interior shelf rather than in the door. Always follow the storage instructions on the packaging.
How do I make my fridge look aesthetic on a budget?
Start with a clean refrigerator, group similar items together, use a few clear containers and choose simple labels. A consistent colour palette and uncluttered shelves can create a coordinated appearance without purchasing expensive accessories.
How often should I clean and organise my fridge?
Wipe spills as they happen, check the contents regularly and do a short organisation reset before grocery shopping. Clean the shelves and drawers as needed, following your refrigerator manufacturer’s instructions.
Do I need matching refrigerator containers?
No. Matching containers can create a coordinated appearance, but they are not essential. A few practical, food-safe containers that fit your shelves are more useful than an expensive collection that doesn’t suit your refrigerator.
Final Thoughts: A Better-Organised Fridge Starts With Simple Habits
An organised refrigerator doesn’t have to be expensive, oversized or perfectly styled.
It simply needs a system that makes sense for your household.
Start by cleaning the shelves, grouping similar foods, using the available space wisely and creating a visible area for food that needs using first. Add a few storage accessories only when they solve a real problem.
Most importantly, choose an arrangement that is easy to maintain.
Because at The Clever Space Edit, we believe that making more room for living isn’t about buying more things. It’s about making better use of the space you already have.
Less clutter. More room to live.