Category: Smart Organization

Practical systems for everyday living.

  • The Ultimate Wardrobe Reset: Organise, Refresh and Rediscover Your Clothes

    A fresh wardrobe doesn’t require a shopping spree. Sometimes, the best outfits are already hanging in your closet.

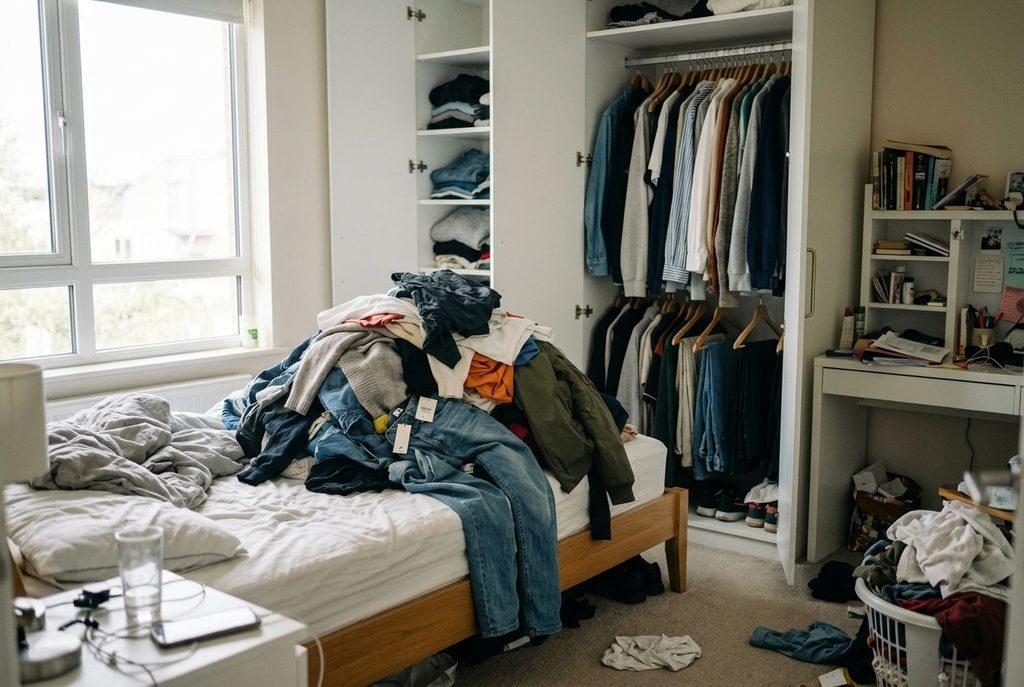
    There is a particular kind of frustration that comes from standing in front of a full wardrobe and feeling as though you have absolutely nothing to wear. Clothes are squeezed onto hangers, forgotten pieces disappear into drawers, and the outfit you want somehow remains impossible to find.

    The problem isn’t necessarily that you need more clothes. It may simply be that your wardrobe needs a reset.

    A wardrobe reset is more than a weekend of tidying. It is an opportunity to rediscover what you own, make better use of your space, reconnect with your personal style and create a closet that makes getting dressed easier.

    Whether you have a spacious walk-in closet, a compact bedroom wardrobe or a rented apartment with limited storage, you can create a wardrobe that feels fresh, organised and effortlessly functional.

    The secret? Work with what you already have before spending money on anything new.

    1. Start With a Wardrobe Reality Check

    Before pulling everything out, take a moment to look at your wardrobe as it currently exists.

    What makes it difficult to use?

    Perhaps your everyday clothes are buried beneath occasional outfits. Maybe accessories have taken over your shelves, or you have several pieces you completely forgot you owned.

    Identify the problems before attempting to solve them.

    Ask yourself:

    • Which clothes do I wear most frequently?
    • What items do I struggle to find?
    • Are there clothes I keep moving from one place to another?
    • Which areas become messy most quickly?
    • Am I storing clothes that belong in another season?

    This quick assessment gives your reset a clear purpose. Instead of organising everything randomly, you will be addressing the things that actually make your wardrobe difficult to manage.

    The Clever Space Edit Tip: Take a photograph of your wardrobe before starting. It gives you a useful reference when deciding which changes have made the biggest difference.

    2. Empty Your Wardrobe and Rediscover What You Own

    This is where the transformation begins.

    Remove your clothes from the wardrobe, working one section at a time if you have limited floor space. Include clothing stored in drawers, baskets, shelves and under-bed containers.

    Seeing everything together can be surprisingly revealing.

    You may discover:

    • Clothes you purchased but rarely wore.
    • Favourite pieces hidden behind less frequently used items.
    • Similar garments in several colours.
    • Outfits you forgot you had.
    • Items that need minor repairs before they can be worn again.

    Avoid rushing straight into reorganising. First, give yourself time to see what you actually own.

    If your wardrobe is particularly large, divide the process into manageable categories: tops, trousers, dresses, skirts, outerwear and accessories.

    The objective isn’t to empty your entire bedroom and create a bigger mess. It is to understand your collection before deciding where everything belongs.
    3. The Four-Pile Method: Make Decisions Without the Drama

    One of the biggest obstacles to an organised wardrobe is deciding what deserves to stay.

    Instead of making endless piles, use four clear categories.

    KEEP — Clothes that earn their space

    These are pieces you wear, enjoy and feel comfortable in. They suit your everyday activities and fit your current lifestyle.

    REPAIR — Clothes worth bringing back to life

    A missing button, loose hem or small stitching problem shouldn’t automatically mean the end of a useful garment. Set aside items you genuinely intend to repair.

    DONATE OR REHOME — Clothes ready for another chapter

    Consider passing on clean, wearable clothes that no longer suit your needs. Someone else may find them useful.

    RECYCLE OR REPURPOSE — Items no longer suitable for wearing

    Damaged or unusable textiles may be suitable for textile recycling or creative reuse, depending on local facilities.

    A useful decision-making question is:

    If I saw this item in a shop today, would I choose it again?

    You don’t need to apply this question rigidly. Sentimental pieces, special-occasion outfits and practical essentials may deserve a place even if you don’t wear them frequently.

    The goal is to create a wardrobe that reflects your actual life, not an imaginary lifestyle.

    4. Clean the Space Before Anything Goes Back

    An often-overlooked part of a wardrobe reset is cleaning the wardrobe itself.

    Once the shelves and hanging rails are empty, take the opportunity to give everything a fresh start.

    • Wipe shelves, drawers and wardrobe surfaces.
    • Clean accessible corners where dust collects.
    • Remove loose packaging and unnecessary storage materials.
    • Allow the interior to dry completely before returning clothes.
    • Check for signs of dampness or mould and address the underlying issue.

    Pay attention to the condition of the wardrobe, particularly if it is built into an older home or apartment.

    Avoid putting clothes away while shelves are damp. Good ventilation is important for keeping stored garments fresh.

    This simple step makes the finished result feel less like rearranging old clutter and more like creating a fresh space.

    5. Organise Your Clothes Around Your Real Life

    Here is where a wardrobe begins to work for you rather than against you.

    Instead of organising solely by colour, think about how you actually get dressed.

    A beautiful wardrobe is useful, but a practical wardrobe is even better.

    Try these organisation systems:

    Everyday essentials

    Keep the clothes you reach for most often in the easiest-to-access section.

    This might include workwear, casual tops, trousers, everyday dresses and frequently worn basics.

    Work and occasion wear

    Group office outfits, formal clothing and special-occasion pieces together.

    This makes it easier to find appropriate clothing without searching through everything else.

    Casual and weekend clothing

    Give relaxed clothing its own space. T-shirts, jeans, comfortable trousers and everyday outfits can be grouped together.

    Seasonal and occasional items

    Move clothing you currently use less frequently to higher shelves or labelled storage containers, provided the storage area is clean, dry and ventilated.

    The guiding principle is simple: the more frequently you use something, the easier it should be to reach.

    6. Master the Art of Folding and Hanging

    The way clothes are stored can make a remarkable difference to how much space your wardrobe offers.

    You don’t necessarily need a bigger wardrobe. You may need a better storage method.

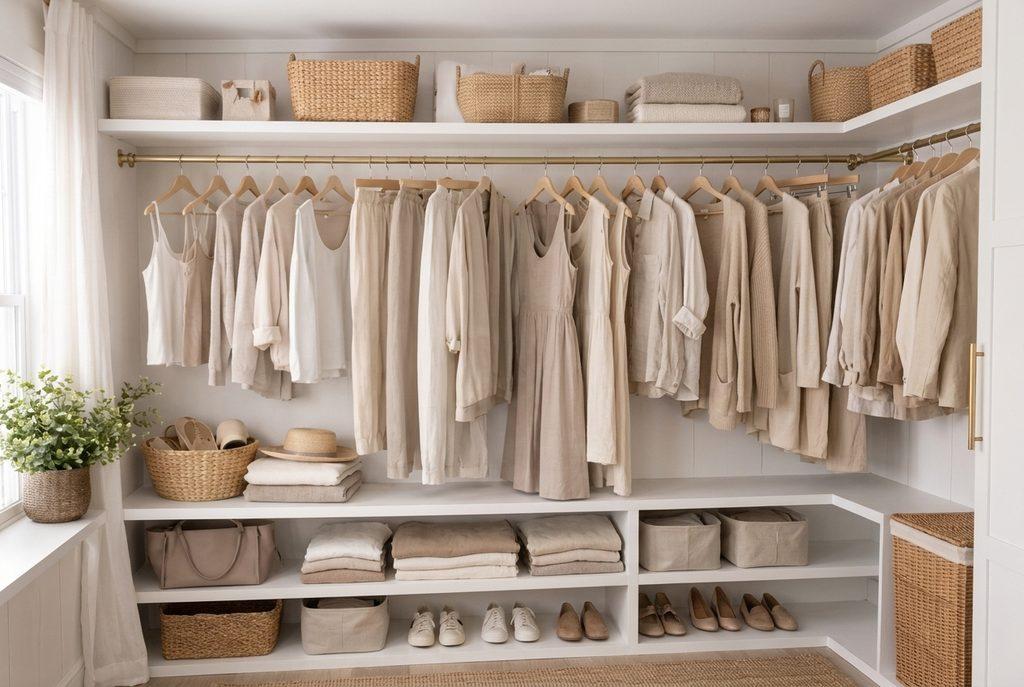
    Use hanging space strategically

    Hang garments that crease easily or benefit from maintaining their shape, such as dresses, blouses, jackets and formal trousers.

    Use similar hangers where possible. Matching hangers create a cleaner appearance and help the hanging rail feel less crowded.

    Fold everyday clothing

    T-shirts, casual trousers, knitwear and comfortable home clothes can often be folded neatly on shelves or inside drawers.

    Try vertical folding for suitable garments so that individual items can be seen without lifting an entire stack.

    Avoid overcrowding

    Clothes need enough space to remain accessible. When garments are packed too tightly, it becomes harder to see what you own and maintain an orderly wardrobe.

    One simple rule: if removing one item causes several others to fall, the section needs attention.

    7. Give Your Drawers and Small Items a Purpose

    Wardrobe drawers often become the hidden source of everyday frustration.

    Socks, underwear, belts, scarves and accessories can quickly turn into one tangled collection.

    The solution is to give small items designated spaces.

    Consider:

    • Drawer dividers for underwear and socks.
    • Small boxes for belts and accessories.
    • Separate sections for everyday and special-occasion items.
    • A dedicated space for scarves and smaller accessories.
    • Small labelled containers for items that are easy to misplace.

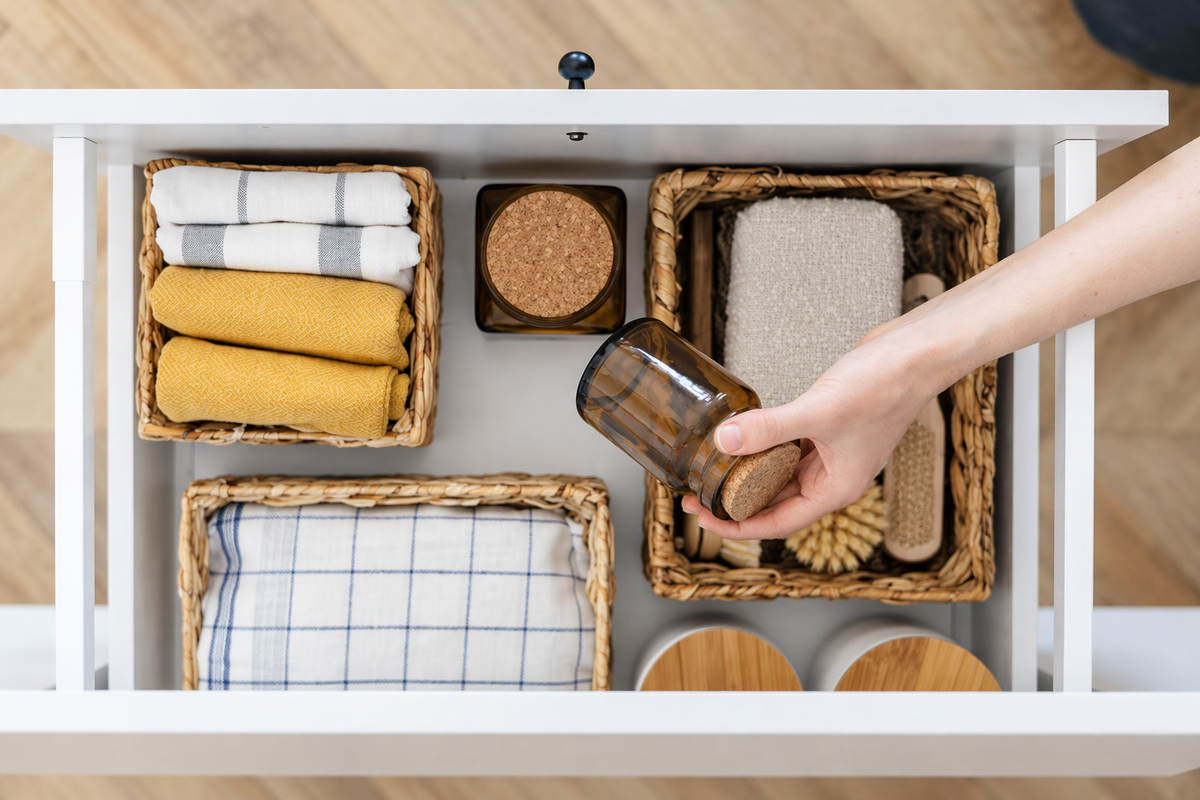
    You don’t have to purchase expensive drawer organisers.

    Repurposed cardboard boxes, clean containers and appropriately sized baskets can work just as well.

    Small-space secret: Use the full depth of your drawers. Vertical folding and simple dividers can make previously wasted space useful.

    8. Rediscover Your Clothes Through Outfit Building

    This is arguably the most enjoyable part of the entire reset.

    Once your clothes are organised, resist the temptation to immediately start shopping for new outfits.

    Instead, experiment with what you already own.

    Choose a few favourite pieces and see how many combinations you can create.

    For example:

    • A favourite pair of trousers can work with several different tops.
    • A simple dress can be styled differently with a cardigan, jacket or accessories.
    • A neutral shirt can become part of both a work outfit and a relaxed weekend look.
    • A skirt can be paired with different tops to create completely different combinations.

    Think of your wardrobe as a collection of building blocks rather than individual outfits.

    You might even discover that you have enough clothing for several new combinations without purchasing a single item.

    Create a small outfit reference collection

    Take photographs of combinations you particularly like.

    Keep them in a dedicated phone album called My Wardrobe Outfits.

    On busy mornings, you can browse your own collection instead of trying to invent an outfit from scratch.

    This small habit can make your wardrobe feel much more versatile.

    9. Refresh Your Wardrobe Without Buying More Stuff

    A wardrobe reset should not become an excuse for unnecessary shopping.

    Before buying new storage products or clothing, consider what you can improve using existing resources.

    Try these inexpensive refresh ideas:

    • Rearrange your clothes to create a more balanced display.
    • Use matching or similar hangers where practical.
    • Repurpose small boxes as drawer dividers.
    • Move rarely used items to appropriate storage areas.
    • Clean and restore accessories that are still useful.
    • Revisit forgotten pieces and experiment with new combinations.

    If you eventually need additional storage, measure the available space first.

    A narrow hanging organiser, a small basket or a set of drawer dividers may solve the problem without introducing bulky furniture.

    For renters, removable and freestanding solutions are particularly useful because they can be taken along when moving.

    The best storage solution is not necessarily the most expensive one. It is the one that makes your existing space easier to use.

    10. Make Your Wardrobe Feel Like a Space You Enjoy

    Organisation is important, but so is the feeling of the finished space.

    A wardrobe can be practical and visually appealing without looking like a luxury showroom.

    Consider a few simple finishing touches:

    • Keep colours and clothing categories visually coordinated.
    • Use attractive baskets or boxes where they genuinely improve storage.
    • Leave a little breathing room between hanging garments.
    • Keep the wardrobe floor clear.
    • Arrange frequently used accessories where they are easy to see.
    • Use soft, removable lighting if the wardrobe interior is poorly lit.

    If your wardrobe is inside a small bedroom, remember that visual simplicity can make the entire room feel more spacious.

    Avoid filling every empty corner with another storage container. Some empty space is useful.

    11. Build a Wardrobe Maintenance Routine That Actually Lasts

    The biggest mistake people make after organising a wardrobe is assuming the job is finished forever.

    Without a simple maintenance routine, clutter gradually returns.

    The good news is that maintaining an organised wardrobe does not require another full weekend of work.

    Try this easy routine:

    Daily: 2 minutes

    • Return clothes to their designated places.
    • Hang or fold items after wearing or laundering them.
    • Avoid leaving clothing on chairs or other surfaces.

    Weekly: 10 minutes

    • Straighten drawers and shelves.
    • Return misplaced accessories.
    • Check that frequently used clothes are easy to access.

    Monthly: 15 minutes

    • Review items that have accumulated in the wrong sections.
    • Remove clothing that needs repair.
    • Reassess storage arrangements that are no longer working.

    Seasonally: 30–60 minutes

    • Review seasonal clothing.
    • Store appropriate items safely.
    • Revisit clothes you have not worn.
    • Identify genuine gaps before considering purchases.

    The secret to long-term organisation is consistency, not perfection.

    Your Ultimate Wardrobe Reset Checklist

    Ready to put everything into action? Use this checklist to work through your wardrobe transformation.

    • Assess the current wardrobe and identify problem areas.
    • Empty the wardrobe, working section by section.
    • Sort clothes into keep, repair, donate and recycle categories.
    • Clean shelves, drawers and hanging rails.
    • Group clothing according to everyday use.
    • Fold and hang garments appropriately.
    • Organise accessories and small items.
    • Experiment with new outfit combinations.
    • Take photographs of favourite outfits.
    • Refresh the space using existing storage solutions.
    • Establish a simple maintenance routine.

    Remember, you don’t have to complete everything in one day. A few well-organised sections are better than an overwhelming project that never gets finished.

    Frequently Asked Questions About Wardrobe Organisation

    1. How often should I reset my wardrobe?

    A seasonal review is a useful starting point, although smaller weekly and monthly maintenance sessions help prevent clutter from building up. You can also do a reset whenever your lifestyle or storage needs change.

    2. How do I organise a small wardrobe with limited space?

    Prioritise frequently worn clothes, use vertical folding, choose slim hangers where appropriate and make use of suitable shelf and drawer organisers. Store occasional clothing separately, ensuring it remains clean and dry.

    3. What should I do with clothes I rarely wear?

    Consider why you keep them. Special-occasion clothing and sentimental pieces may deserve their space. For everyday garments you no longer need, consider donating or rehoming wearable items.

    4. How can I organise my wardrobe without spending money?

    Start with what you already own. Reuse boxes as drawer dividers, reorganise existing shelves, group similar garments and create outfit combinations before purchasing additional clothing or storage products.

    5. How do I stop my wardrobe from becoming messy again?

    Return clothes to their designated places, avoid overcrowding and schedule short maintenance sessions. A wardrobe is easier to maintain when every category has a clear home.

    A Fresh Wardrobe, A Fresh Perspective

    An organised wardrobe is not about owning fewer clothes simply for the sake of minimalism. It is about making the most of what you have.

    It is about finding the shirt you love without searching through a mountain of clothing, rediscovering an outfit you had forgotten and making everyday decisions feel a little easier.

    You may discover that the clothes you thought you needed to replace were perfectly good all along. They simply needed to be seen, organised and styled differently.

    So before adding another item to your shopping list, give your wardrobe a second look.

    Your next favourite outfit might already be waiting inside.

    Less clutter. More room to live.

    The Clever Space Edit — practical ideas for making every corner of your home work better.
  • Create a Home Repair and Reuse Corner: The Small Space That Can Save You Money and Reduce Waste

    Create a Home Repair and Reuse Corner: The Small Space That Can Save You Money and Reduce Waste

    A loose button, a wobbly chair or a bag with a broken strap can seem too minor to address immediately. Without a convenient place to repair them, useful items often end up in a cupboard or rubbish bag.

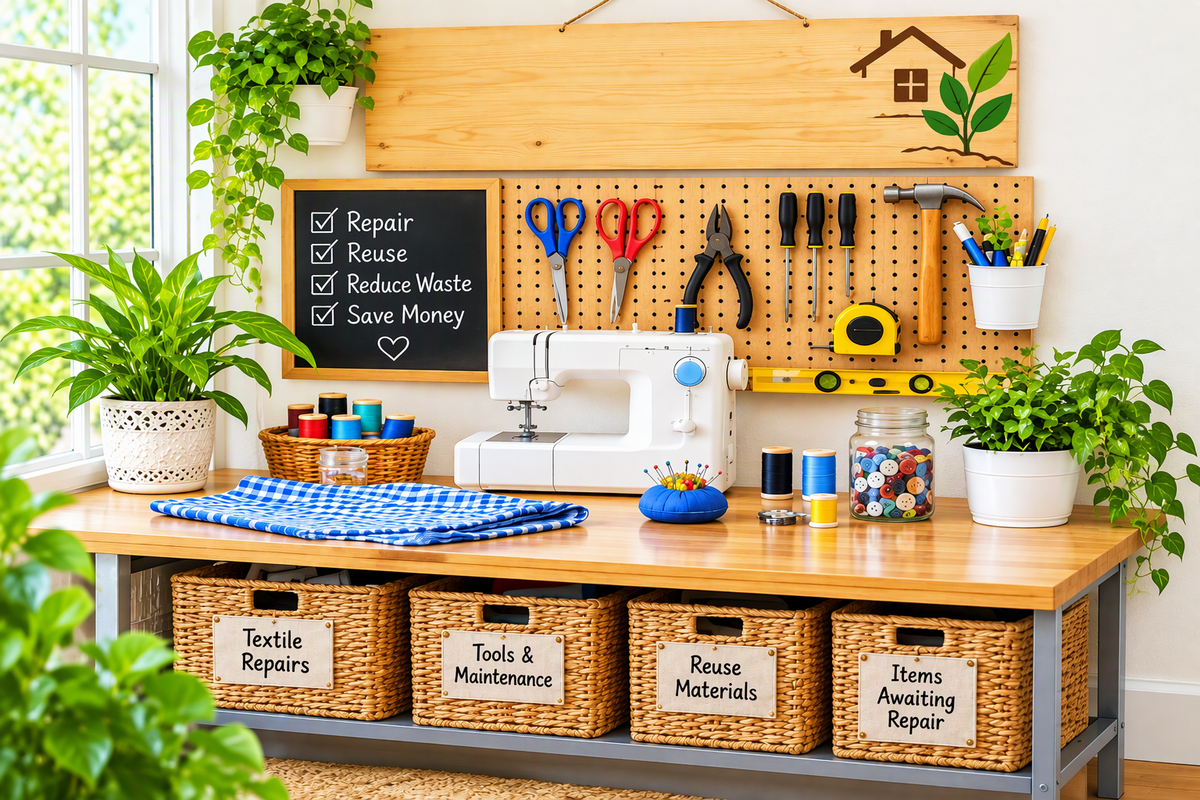
    A home repair and reuse corner does not need to be a workshop. A shelf, drawer, portable box or small desk area can make repairing something easier than forgetting about it.

    1. Choose a space that encourages action

    Choose a dry, well-ventilated location accessible to the adults responsible for maintenance. Keep it away from food preparation areas, young children and pets. If space is limited, use a portable container.

    2. Divide the station into four sections

    Clothing and textile repairs

    Keep needles, common thread colours, spare buttons, small patches, scissors and a measuring tape together for loose buttons and minor seam repairs.

    Household maintenance

    Depending on your needs, keep a measuring tape, household notebook, suitable cleaning cloths, approved care materials and basic hand tools. Electrical, structural and plumbing work should be handled by qualified professionals when appropriate.

    Reuse materials

    Store clean fabric remnants, suitable ribbons, spare buttons, clean jars and reusable packaging, but set a strict limit on the amount you keep.

    Items awaiting repair

    Create a small container for things that need attention. Add a note describing the problem, then review the container regularly. If something remains there for months, decide whether repair, donation or responsible recycling is appropriate.

    3. Introduce the five-minute repair habit

    When you notice a minor problem, ask whether it can be repaired safely, whether you have suitable supplies, whether you can complete the job correctly and whether professional repair is more suitable. Never attempt unsafe electrical work, gas-appliance repairs or structural repairs without qualified help.

    4. Keep a repair record

    Record what was repaired, when it was repaired, what was needed and whether it worked. Patterns can reveal that an item needs better maintenance or replacement with a more durable alternative.

    Quick Repair Checklist beside a repair log notebook, tools mug, plant and wooden house ornament

    5. Give household items a second life

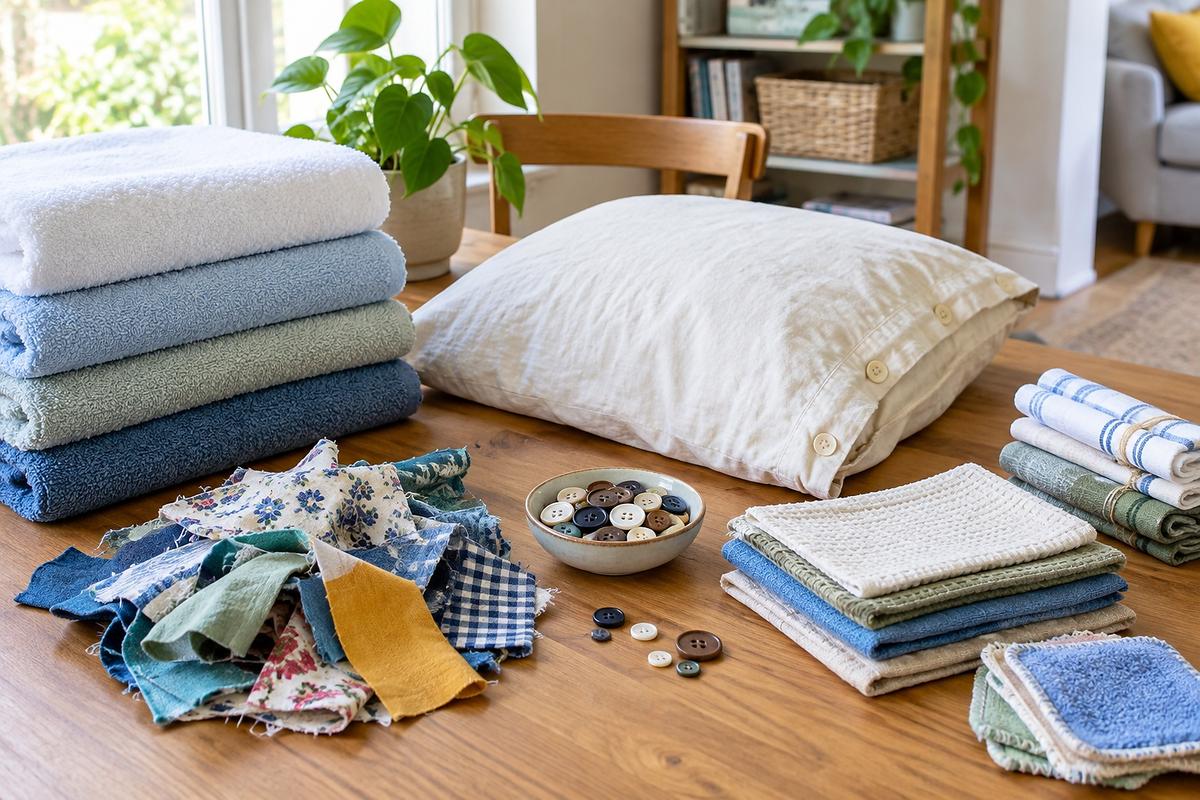
    A damaged cotton garment might provide fabric for a small repair. Unused buttons can rescue a favourite shirt. A sturdy container can hold repair materials, and a suitable towel can become a cleaning cloth. The distinction is between genuine reuse and keeping things without purpose.

    Folded fabrics in a wooden crate beside a jar of buttons and a sign encouraging items to get a second life

    6. Create a monthly review

    Ask which items have been repaired, which need professional attention, which supplies you keep buying unnecessarily and whether anything stored in the station is no longer useful.

    Starter checklist

    • Choose a safe storage area.
    • Gather existing suitable supplies.
    • Separate textile repairs from maintenance.
    • Create a reuse-material section.
    • Establish an awaiting-repair container.
    • Keep an inventory.
    • Review the station monthly.

    Frequently asked questions

    What should a basic home repair kit contain?

    Suitable basic supplies may include measuring equipment, textile repair materials, cleaning cloths and simple hand tools.

    How does repairing reduce waste?

    Repairing suitable belongings can extend their useful life and reduce the need to discard and replace them.

    How much space is needed?

    A small shelf, drawer or portable container can be sufficient.

    A well-organised home is not one where nothing breaks. It is one where small problems do not automatically become reasons to throw useful things away.

  • Responsible Home Decluttering: A Donation and Reuse System

    Responsible Home Decluttering: A Donation and Reuse System

    Decluttering should not simply move the problem somewhere else. A room may look better, but the items may have been pushed into another cupboard, garage or storage space. Responsible home decluttering asks not only what you want to remove, but where each item should go next. For more practical ideas, see our no-buy home reset.

    1. Give Every Item a Better Next Step

    Establish five destinations: keep and use, repair, give away, sell or exchange, and recycle or dispose of responsibly.

    Keep What Supports Your Life

    Keep belongings that genuinely support your household, and store them where they are likely to be used.

    Repair Before Replacing

    A missing button or loose handle may be repairable, but do not keep unsafe or extensively damaged items simply because you hope to fix them someday.

    Give Useful Items a New Home

    Suitable belongings may help a relative, neighbour, community organisation or someone setting up a home. Ask first instead of assuming someone needs an item.

    Sell, Swap or Exchange with Care

    Items in good condition may have resale or exchange value. Be honest about their condition and functionality.

    Recycle and Dispose Responsibly

    Check what local services accept, using appropriate arrangements for electronics, batteries and other special waste.

    2. Build a Household Rehoming Station

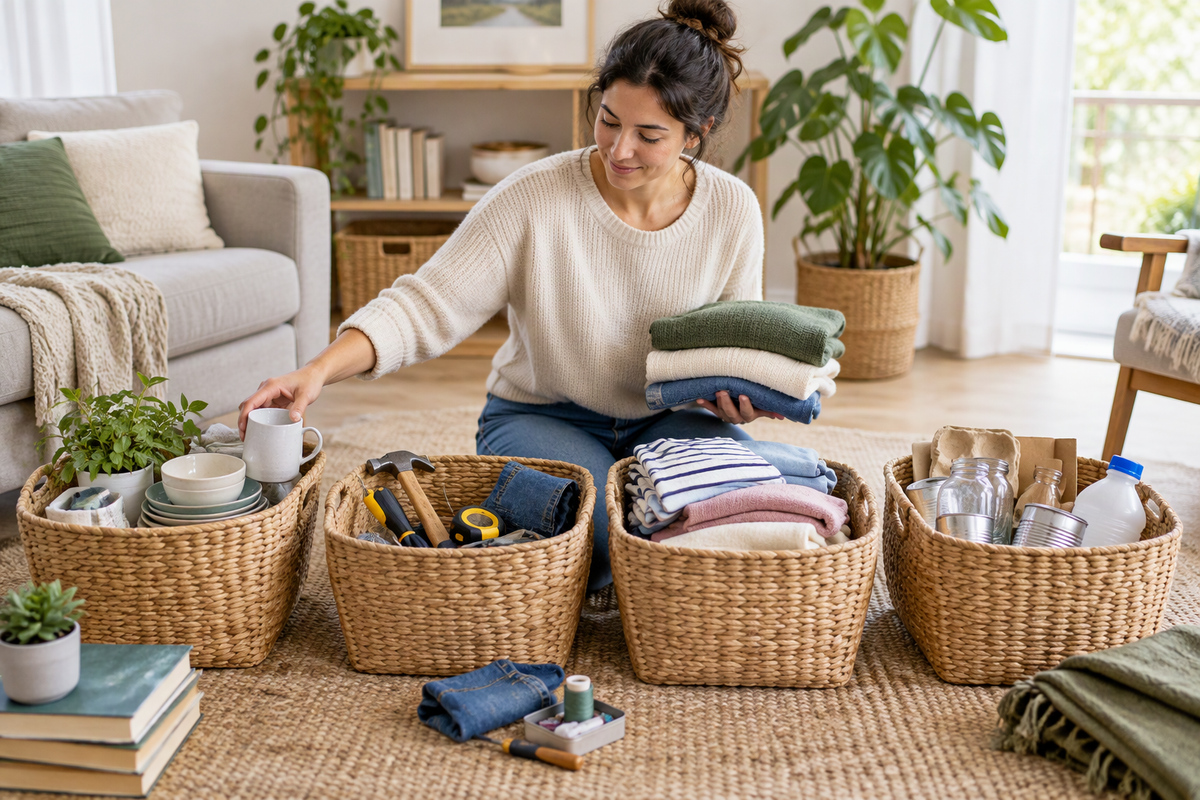
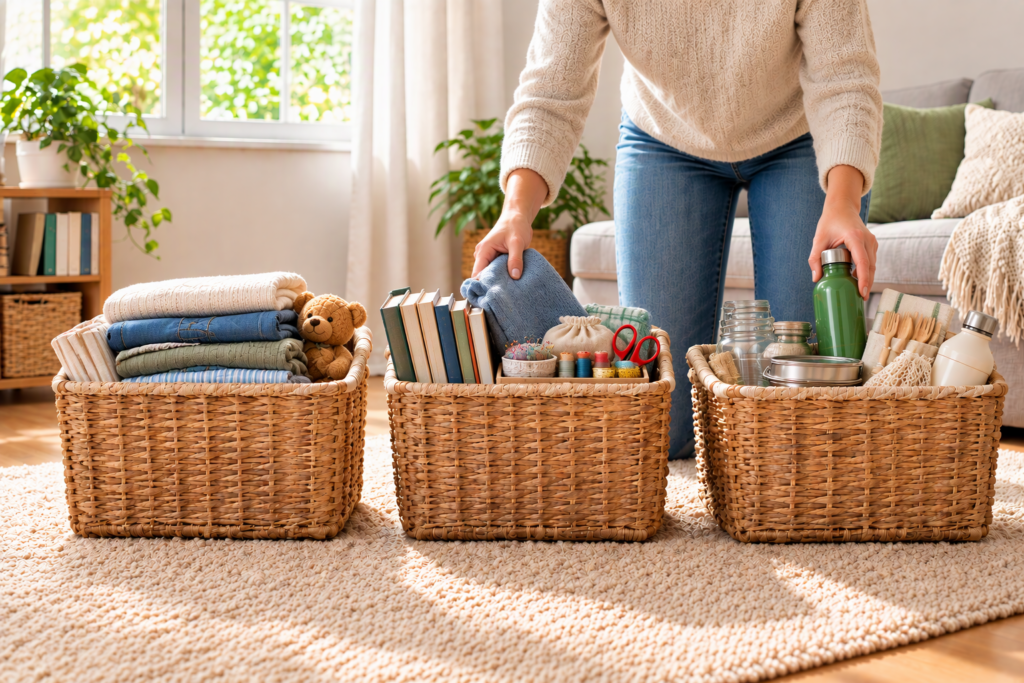
    Choose a small temporary location for items awaiting their next destination. Use separate sections for clothing and textiles, books and stationery, kitchen goods, repairable belongings and items awaiting collection. Keep the station small and set a collection date. If you are preparing for a move, our guide to moving house with less waste offers additional reuse ideas.

    Household rehoming station with labelled baskets for donate, share and give away, hanging clothes, blankets, books and plants

    Create a Home Repair and Reuse Corner

    Create a small repair-and-reuse corner near your rehoming station. Keep a basic toolkit, reusable containers for screws and small parts, a notebook for repair notes, and materials such as spare buttons, cord, fabric or suitable packaging. Label the area clearly and review it regularly so it supports practical repairs rather than becoming another storage pile.

    Only keep repair supplies that are safe and genuinely useful. For electrical items, use appropriate caution and seek qualified help when a repair is beyond your experience.

    3. Find the Right New Home for Each Item

    Before offering an item, ask whether it is clean, complete, working, safe and accepted by the intended organisation. The goal is to offer something useful rather than transfer a disposal problem.

    4. Give Your Rehoming Plan a Seven-Day Deadline

    Once an item enters the rehoming station, give it a specific destination and arrange the next step within seven days where practical. If nobody wants it, reconsider its destination rather than keeping it indefinitely.

    5. Turn Responsible Decluttering into a Habit

    A short monthly review can identify unused clothing, duplicate equipment, books, accessories, broken items and reusable materials before they accumulate. For another way to find useful storage opportunities, read 12 ideas for forgotten spaces in your home.

    Organised household rehoming station with baskets for clothing, books, sewing supplies and reusable household items

    6. Start a Household Exchange Tradition

    Friends, neighbours or relatives can exchange books, clean household accessories, suitable clothing, decorative items, kitchen equipment or gardening supplies. Set simple rules about cleanliness, condition and suitability.

    7. Track What Leaves Your Home

    Record what is donated, sold, repaired, exchanged or recycled. This can reveal repeated purchases and help you make more thoughtful decisions.

    Responsible Decluttering Checklist

    • Is the item still useful?
    • Can it be repaired?
    • Would someone genuinely benefit?
    • Is it clean and safe to pass on?
    • Have you identified a suitable recipient?
    • Is there an appropriate recycling route?
    • Have you arranged collection or delivery?

    Questions About Responsible Decluttering

    What is the most responsible way to declutter?

    Prioritise continued use, repair, reuse and suitable donation before recycling or disposal.

    Where can I donate household items?

    Look for reputable local charities, community organisations, schools and donation programmes, and confirm their needs first.

    Should broken items be donated?

    Only when the receiving organisation specifically accepts repairable items. Never pass on unsafe or unusable products as ordinary donations.

    How often should I declutter?

    A short monthly review can prevent belongings from accumulating, supported by larger seasonal reviews.

    The end of an item’s usefulness in your home does not always have to be the end of its useful life. A thoughtful system helps useful things find somewhere they are needed.

  • The No-Buy Home Reset: How to Organize Your House Using Things You Already Own

    The No-Buy Home Reset: How to Organize Your House Using Things You Already Own

    What if your next home makeover cost absolutely nothing? A drawer becomes difficult to use and we look for dividers. A cupboard becomes crowded and we search for matching containers. But most households already own items that could solve a problem somewhere else.

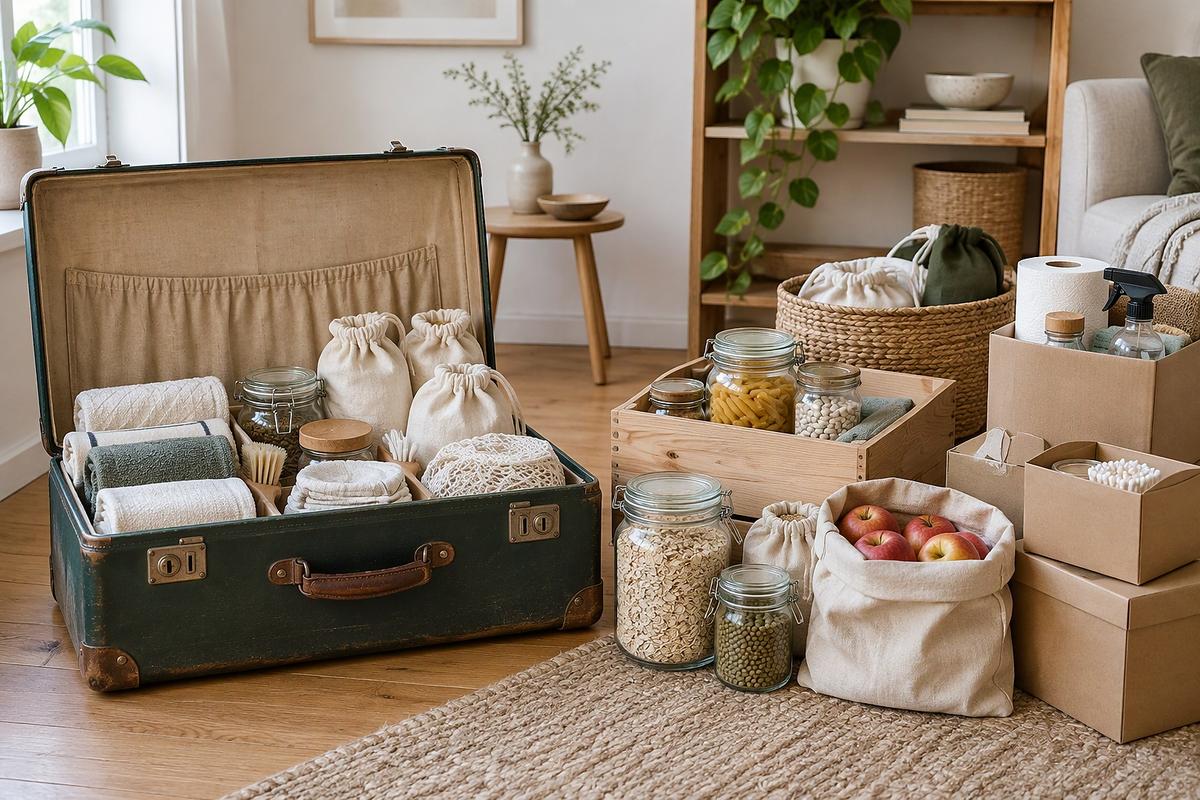
    An unused suitcase, sturdy box, glass jar, old pillowcase or fabric bag might have a second job. The no-buy home reset is not about doing without. It is about becoming more resourceful with what you already have.

    Step 1: Start with a household inventory

    Choose one room and identify items that are used regularly, useful but stored in the wrong place, forgotten or duplicated. This is a redistribution exercise, not a shopping exercise.

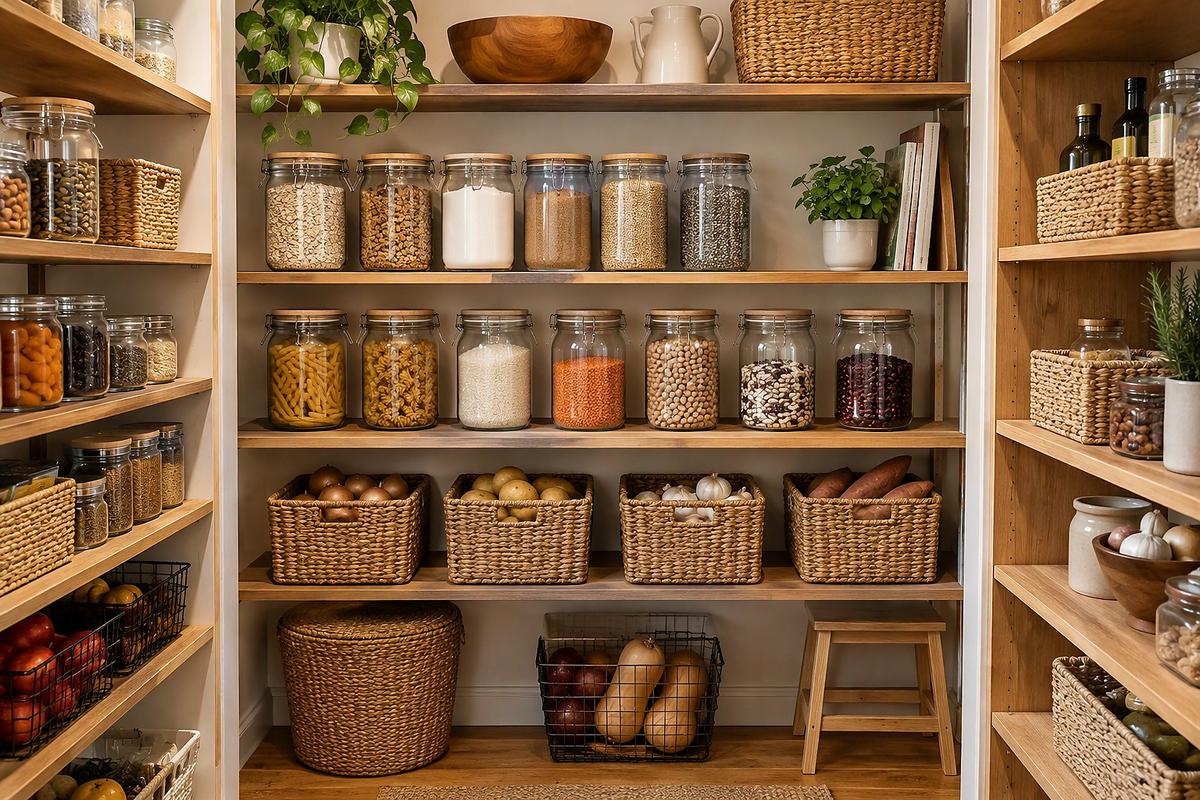
    Organised pantry with jars and baskets

    Step 2: Give forgotten containers a second job

    • Use an unused suitcase for seasonal clothing, spare bedding or travel accessories.
    • Use a sturdy cardboard box for lightweight supplies or items awaiting donation.
    • Use a clean glass jar for buttons, sewing accessories or craft supplies.
    • Use an empty gift box for cards, envelopes or personal accessories.
    • Use a clean fabric bag for reusable shopping bags or fabric awaiting repair.

    Containers should be clean, dry, structurally sound and suitable for the new use. For example, an unused suitcase or low container can create useful under-bed storage. Never reuse packaging that contained hazardous chemicals for household storage.

    Reused containers organising household supplies

    Step 3: Turn old textiles into useful resources

    A worn cotton T-shirt can become a cleaning cloth. An old pillowcase can protect a handbag or store a cushion. Clean fabric remnants can become reusable gift wrap, and a suitable old towel can become a household cloth. Do not keep damaged fabric indefinitely. Use an appropriate textile recycling option where available.

    Folded textiles and reusable cloths

    Step 4: Create a household reuse library

    Designate one small location for reusable ribbons, suitable cardboard, spare buttons, fabric remnants, gift bags, jars and repairable accessories. Set a physical limit, such as one small box. When it is full, use something, donate it or recycle it before adding more.

    Step 5: Organise by activity rather than object

    Bring supplies together according to the task they support. Create a household repair kit, gift preparation kit, paperwork station or plant-care station. This reduces searching and prevents duplicate purchases.

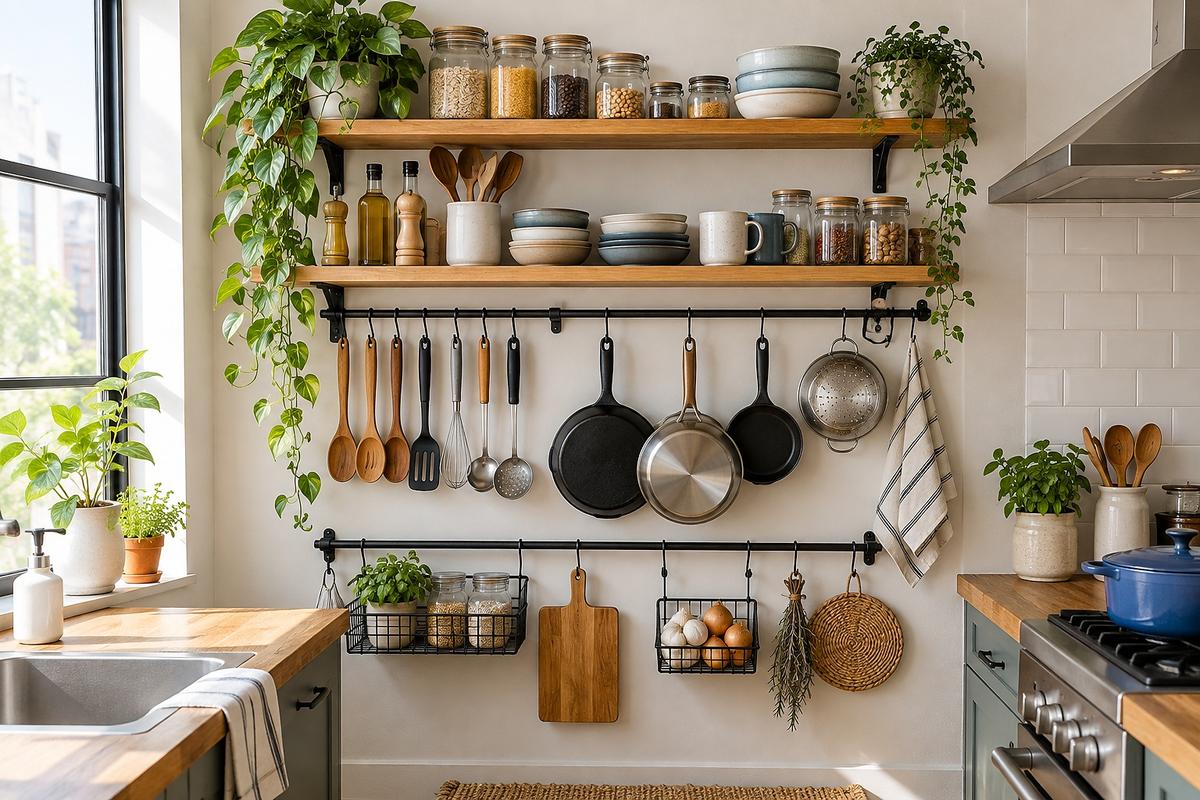
    Kitchen wall storage

    Step 6: Introduce a 48-hour purchase pause

    Before buying an organisation product, wait 48 hours. Identify the exact problem, look for something you already own, measure the space and decide whether the purchase is still worthwhile.

    Step 7: Make the home easier to maintain

    Return shared items to their locations, keep frequent-use supplies accessible, review the reuse box, repair suitable items and rehome belongings that no longer serve a purpose. Hidden storage zones, such as under-bed containers or high shelves, can keep useful items accessible without crowding everyday surfaces.

    The five-day no-buy reset

    1. Audit one room and identify unused items.
    2. Redistribute containers and household accessories.
    3. Repurpose suitable textiles and packaging.
    4. Create a reuse library and repair station.
    5. Identify purchases you can avoid and establish a maintenance routine.

    Common mistakes to avoid

    • Keeping every container because it might be useful someday.
    • Repurposing materials that are unhygienic or unsafe.
    • Replacing clutter with reusable clutter.
    • Spending money on a supposedly no-buy project.
    • Keeping items with no realistic future use.

    Frequently asked questions

    Can I organise my home without buying storage products?

    Yes. Reassigning existing containers, furniture and household materials can solve many everyday organisation problems.

    What can I reuse for storage?

    Suitable jars, boxes, suitcases, fabric bags and gift boxes can be useful, depending on their condition and previous use.

    How do I prevent reuse supplies becoming clutter?

    Set a physical storage limit, review contents regularly and keep only materials with a realistic purpose.

    A beautiful home does not have to be built through constant shopping. Sometimes the solution is already sitting in a cupboard, waiting for a second chance.

  • Small Kitchen Storage Ideas: 15 Ways to Maximize Every Inch

    A small kitchen becomes frustrating when every task requires moving three other things first. The most useful storage changes reduce that friction by giving everyday items clear, reachable homes.

    These ideas focus on small kitchens in rentals and compact homes, using unusual but practical systems rather than expensive remodeling.

    1. Make a daily-use runway

    Choose the shortest path from storage to preparation area and keep it clear. Store the tools used along that route together, such as a board, knife, oil, and cooking spoon, instead of grouping them only by category.

    2. Create a “first five minutes” drawer

    Place the items you reach for at the beginning of the day in one drawer or basket: coffee filters, tea, a measuring spoon, and a reusable bottle. This keeps morning essentials from spreading across the counter.

    3. Use a ceiling-height peg rail carefully

    A tall peg rail can use otherwise ignored wall height for lightweight pans, utensils, or reusable bags. In a rental, choose a freestanding rail or removable solution and keep heavier cookware low.

    4. Install a magnetic spice strip inside a cabinet door

    If counter space is limited, a magnetic spice system can keep small jars visible without taking up a shelf. Keep it away from heat and check that the cabinet door closes fully before loading it.

    5. Add a fold-out chopping board

    A board that slides over a drawer or rests securely across the sink can create temporary preparation space. Store it vertically afterward so it does not become another permanent counter object.

    6. Give the rolling cart a single job

    A narrow cart works best when it is not a general dumping place. Assign it one purpose, such as baking, breakfast, pantry overflow, or cleaning supplies, and label each level by function.

    7. Store food by the action it supports

    Instead of arranging every item by food type, create small action groups such as “quick breakfast,” “school lunch,” or “weeknight cooking.” This makes the storage system faster to use than a perfectly alphabetical pantry.

    8. Use one open cabinet as a display-and-access zone

    Keep the items used several times a day in one open section, while less-used supplies stay behind doors. The open zone should be edited regularly so it remains useful rather than becoming visual clutter.

    9. Use shelf risers for short stacks

    Shelf risers work best when they separate short stacks, not when they create another overloaded level. Use them for mugs, bowls, tins, or small jars that are otherwise hidden behind taller items.

    10. Store lids vertically

    Use a file-style divider for pan lids, baking trays, chopping boards, and cooling racks. Vertical storage lets you remove one item without dismantling a stack.

    11. Use the sink area as a timed zone

    Keep only the items needed during washing and drying near the sink. A small draining mat or foldable rack can disappear when the task is finished, returning the area to usable counter space.

    12. Make the awkward corner seasonal storage

    Deep corners are better for serving dishes, bulk supplies, or occasional appliances than for everyday items. Rotate the contents every few months so the corner does not become forgotten storage.

    13. Create a container boundary

    Give food-storage containers one physical boundary, such as one drawer or shelf. When the boundary is full, the next step is editing mismatched lids, not adding another container.

    14. Use a counter-clutter parking card

    Place a small card or label inside a cabinet that says “temporary items.” When something lands on the counter and has no home, put it there until you decide whether it belongs in the kitchen.

    15. Use a five-minute closing sequence

    1. Clear the main preparation area.
    2. Return ingredients to their action groups.
    3. Put lids and containers together.
    4. Move one appliance off the counter if it was not used.
    5. Wipe the surface and leave it ready for the next task.

    Final thoughts

    The best small kitchen storage ideas are not the ones that add the most containers. They are the ones that make common actions quicker and reduce the number of items that live permanently on the counter.

    For more warm, practical ideas for renters and small-space homeowners, subscribe for more ideas.

    Related reading

  • How to Declutter Your Kitchen Counters in 30 Minutes

    How to Declutter Your Kitchen Counters in 30 Minutes

    Kitchen counters collect everything because they are convenient. Appliances, mail, groceries, school items, and half-finished tasks can quickly turn useful work space into visual noise. A focused thirty-minute reset can make the kitchen feel larger without a renovation.

    Minutes 1 to 10: remove everything that does not belong

    Take off paperwork, bags, empty packaging, and items that belong in another room. Put them in one temporary basket rather than walking away from the kitchen repeatedly.

    Minutes 11 to 20: choose the everyday essentials

    Keep only the appliances and tools you use frequently. If an appliance is used once a week, store it in a cabinet or on a shelf if possible. Give frequently used items a defined zone near the place where you use them.

    Minutes 21 to 30: contain the small clutter

    • Use a tray for oils and everyday seasonings.
    • Keep a small bowl for keys and loose items.
    • Store reusable bags in one basket.
    • Place mail in a vertical file instead of a pile.

    Keep it clear

    Finish by wiping the counters and returning the temporary basket items to their proper homes. A quick evening reset keeps the kitchen ready for cooking and makes the whole space feel more intentional.

    Clear counters are not about perfection. They are about making the next task easier.

  • Small Entryway Organization Ideas for Renters

    Small Entryway Organization Ideas for Renters

    A small entryway can become the hardest-working part of a rental home. It is where keys, shoes, bags, mail, and daily clutter collect, often without a dedicated closet. The goal is not to add more furniture. It is to create a simple landing zone that helps everything leave the doorway quickly.

    Start with one drop zone

    Choose one surface or wall area for the items you use every day. A narrow console, slim shelf, or small tray can hold keys and sunglasses. Keep the surface intentionally small so it encourages a quick reset rather than becoming another dumping ground.

    Use vertical storage

    Removable hooks, an over-the-door organizer, and a lightweight pegboard can add useful storage without permanent changes. Use one hook for each person or category, such as bags, coats, and reusable shopping totes.

    • Place everyday shoes in one open basket.
    • Keep incoming mail in a small vertical file.
    • Store umbrellas and reusable bags together.
    • Leave a little clear floor space for easier cleaning.

    Make the system easy to maintain

    The best entryway system is the one you can reset in under two minutes. Remove items that belong elsewhere, return shoes to the basket, and clear the mail file once a week. A small mirror or warm lamp can make the space feel finished without taking up valuable room.

    For renters, thoughtful organization is less about permanent renovations and more about giving everyday items a clear home.

  • How to Organize Your Fridge on a Budget: A Simple, Aesthetic Setup

    How to Organize Your Fridge on a Budget: A Simple, Aesthetic Setup

    A cluttered fridge can make even a well-planned kitchen feel disorganized. Food gets pushed to the back, leftovers are forgotten, duplicate groceries find their way into the shopping basket, and everyday cooking becomes more frustrating than it needs to be.

    The good news? You don’t need an expensive refrigerator makeover to fix it.

    With a few inexpensive containers, a practical storage system and a little weekly maintenance, you can create a fridge that looks beautiful, keeps food easier to find and helps reduce unnecessary food waste.

    The secret is to organise around how you actually use your kitchen, rather than buying every matching container you see online.

    Whether you have a compact apartment fridge or a larger family refrigerator, these budget-friendly fridge organisation ideas will help you create a cleaner, more functional space without overspending.

    1. Start With a Fresh, Clean Fridge

    Before buying storage accessories, start with what you already have.

    Take everything out of the refrigerator and place perishable food somewhere appropriately cold while you work. Check food dates, discard anything that is no longer safe to keep, and group similar items together.

    Next:

    • Remove shelves and drawers if your refrigerator manual allows it.
    • Wash removable parts with warm, soapy water.
    • Wipe the interior, corners and door compartments.
    • Dry everything thoroughly before replacing the shelves.
    • Check food packaging for leaks, spills or damaged seals.

    This first step is important because organising around old spills and forgotten food only creates more work later.

    Budget tip: You don’t need specialist cleaning products. A clean cloth, warm water and mild dish soap are usually sufficient for routine cleaning. Follow your refrigerator manufacturer’s cleaning instructions.

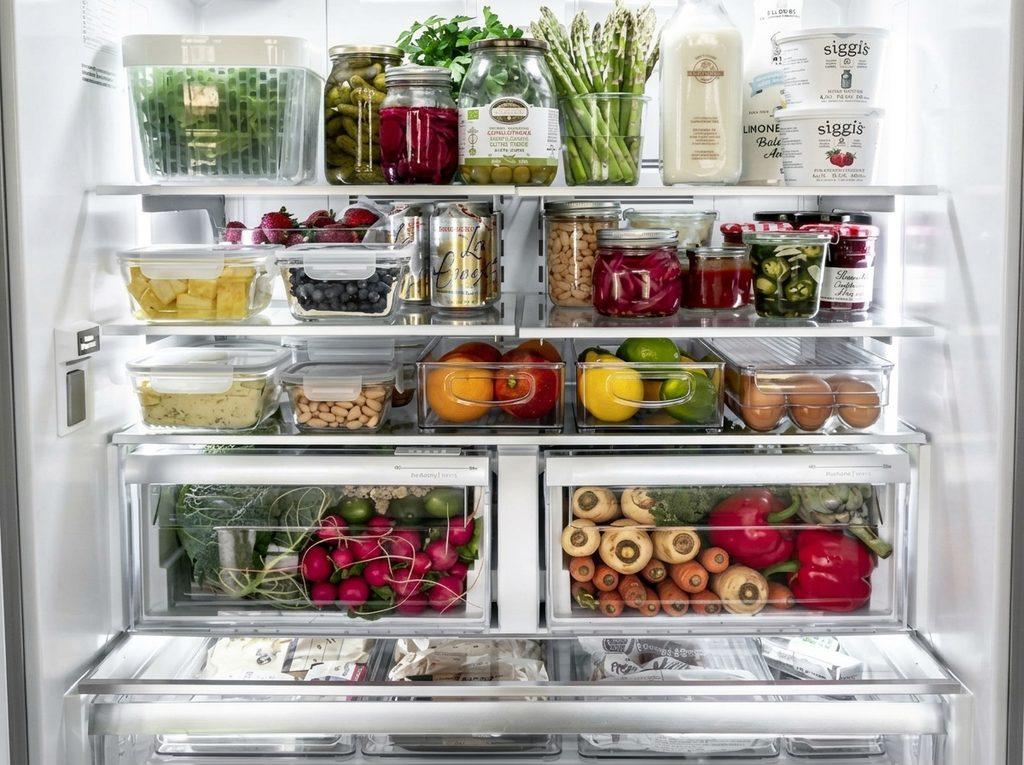
    2. Understand Your Fridge Zones

    One of the easiest ways to improve refrigerator organisation is to give different food categories designated spaces.

    A consistent arrangement makes it easier to find ingredients, return groceries to the correct places and notice what needs using.

    Here is a practical starting point:

    Upper shelves: Ready-to-eat foods

    Use the upper shelves for foods that are already prepared or do not need further cooking before eating.

    Examples include:

    • Covered leftovers
    • Ready-to-eat snacks
    • Prepared ingredients
    • Drinks that need refrigeration

    Middle shelves: Everyday essentials

    Keep frequently used items together so they are easy to reach.

    Depending on your refrigerator layout, this could include:

    • Dairy products
    • Eggs in their original carton
    • Cheese
    • Yogurt
    • Opened foods that require refrigeration

    Lower shelf: Raw meat and seafood

    Keep raw meat, poultry and seafood in sealed, leakproof containers. A tray can provide an additional barrier against drips.

    Placing these items low in the refrigerator helps prevent their juices from contaminating ready-to-eat foods.

    Crisper drawers: Fruits and vegetables

    Use the drawers for fresh produce and follow any humidity guidance provided by your refrigerator manufacturer.

    Some drawers are designed to retain more moisture for leafy vegetables, while others provide conditions better suited to certain fruits.

    Avoid overcrowding the drawers, and remove spoiled produce promptly.

    Refrigerator door: Condiments and sauces

    The door is generally a warmer area because it is exposed to temperature changes whenever the refrigerator opens.

    Use it for suitable condiments, sauces and other products whose labels recommend refrigerated storage.

    Avoid making it the main storage location for particularly temperature-sensitive foods such as milk.

    A useful safety reminder: Keep your refrigerator at or below 40°F (4°C), using an appliance thermometer to check the actual temperature. The arrangement of shelves can vary between refrigerator models, so follow your appliance instructions and food packaging guidance. The USDA provides additional advice on safe refrigerator storage.

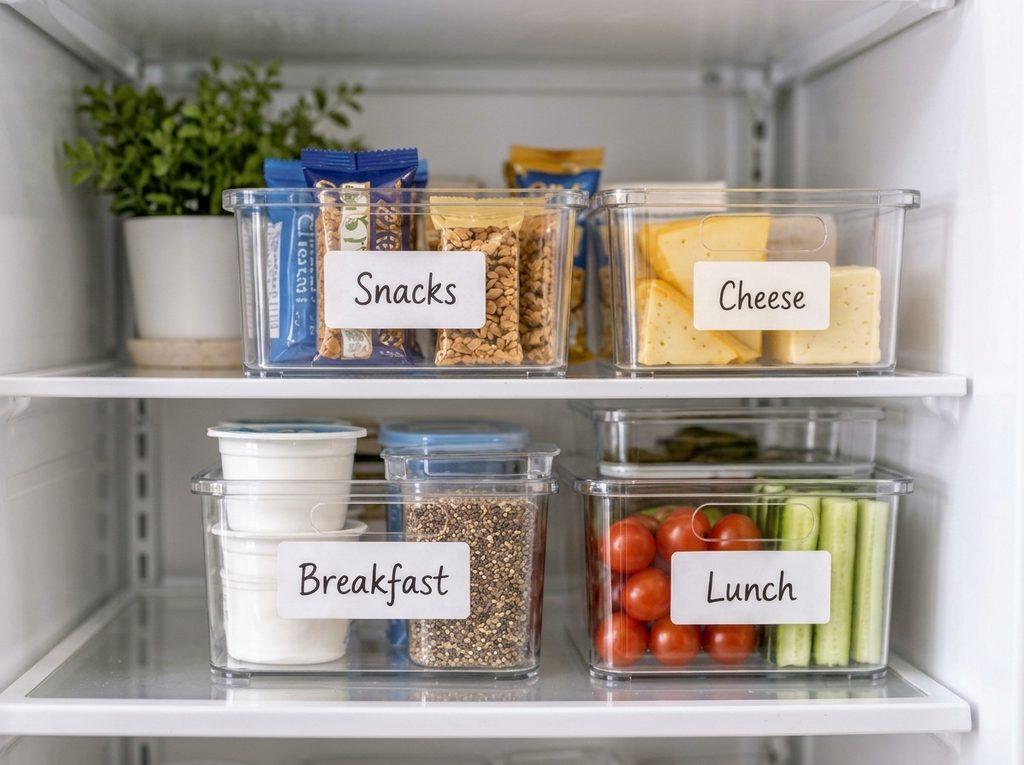
    3. Use Clear Storage Bins to Create Order

    Clear refrigerator bins are among the most useful accessories for creating an organised fridge.

    They allow you to group similar items without hiding them behind other groceries. Instead of moving several containers to reach something at the back, you can pull out an entire category.

    Consider creating these simple zones:

    • Breakfast bin: Yogurt, spreads and breakfast ingredients.
    • Snack bin: Individually packaged snacks and suitable ready-to-eat foods.
    • Cheese bin: Packaged cheese and other related products.
    • Lunch preparation bin: Ingredients you regularly use for packed lunches.
    • Use-first bin: Food that needs attention before you buy more.

    You don’t need a separate container for every food category. Start with one or two bins and see which areas would benefit most.

    Budget tip: Before purchasing new organisers, measure your shelves and check whether you already own suitable food-safe containers. Repurposing containers you have at home can be more economical than buying a complete matching set.

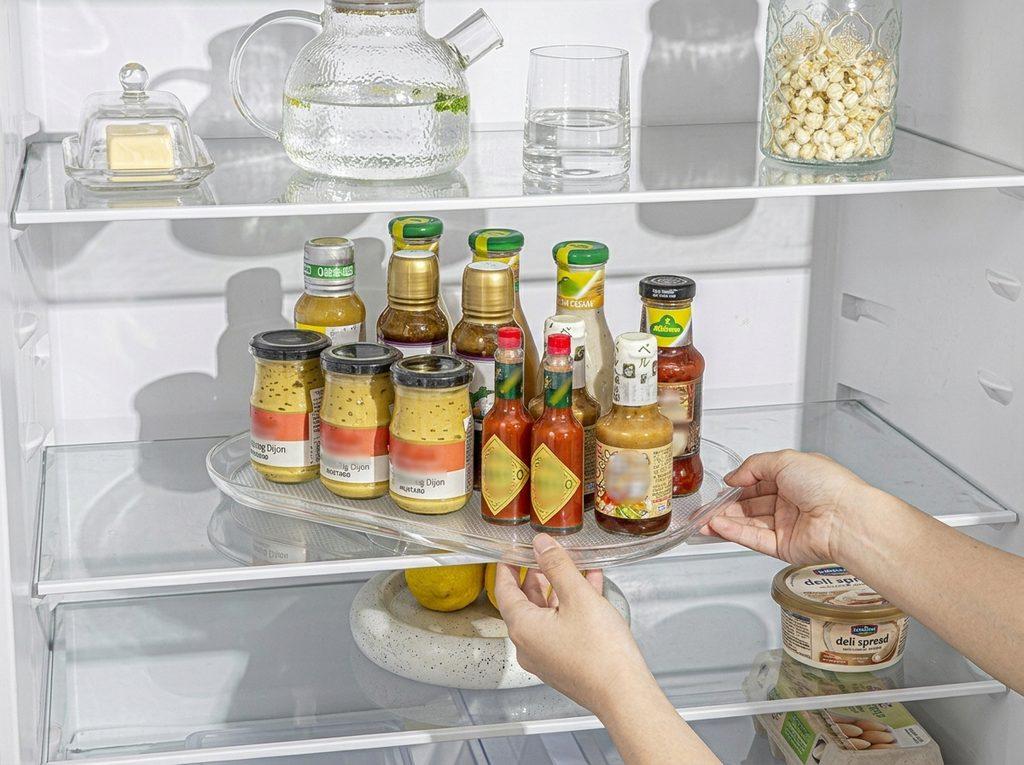
    4. Make Better Use of Deep Shelves With a Turntable

    Deep refrigerator shelves can create a familiar problem: small jars and bottles disappear behind larger items.

    A small turntable, sometimes called a lazy Susan, can make these spaces easier to manage.

    It works particularly well for:

    • Sauces and dressings
    • Small jars
    • Condiments
    • Frequently used bottles

    Instead of reaching behind everything, simply rotate the turntable to bring the item forward.

    Before purchasing one, measure the available shelf width and depth. Check the height as well, especially if the shelf above cannot be adjusted.

    A turntable is helpful, but it isn’t essential. If it doesn’t fit your refrigerator, a shallow open bin can achieve a similar result.

    5. Add a Few Space-Saving Accessories

    The most effective fridge organisation systems are often surprisingly simple.

    You don’t need a refrigerator full of accessories. Choose only the items that solve a genuine storage problem.

    Here are a few affordable options:

    Can dispensers

    These keep canned drinks together and can make them easier to access in a crowded refrigerator.

    Stackable storage bins

    Stackable bins can help make use of vertical space, provided they fit securely and don’t obstruct airflow.

    Shelf risers

    These create an additional level for suitable lightweight items and can make tall shelves more functional.

    Drawer dividers

    Small dividers help separate produce or packaged items so they don’t become one crowded pile.

    Egg containers

    An egg holder can provide a neat storage option, although keeping eggs in their original carton is also perfectly practical.

    Before buying anything: Measure your refrigerator, check shelf height and consider whether the accessory will make everyday access easier. A storage product that looks attractive but doesn’t fit properly is not a good investment.

    6. Create a Coordinated Look Without Spending Too Much

    An aesthetically organised refrigerator is not necessarily an expensive one.

    The visual difference often comes from consistency rather than the number of products you buy.

    Try these simple ideas:

    Choose a limited colour palette.

    Clear containers, white labels and neutral accessories can create a clean, coordinated appearance.

    Use similar containers where practical.

    You don’t need everything to match perfectly. Even two or three matching bins can make a noticeable difference.

    Keep labels simple.

    Use short labels such as:

    • Snacks
    • Breakfast
    • Cheese
    • Drinks
    • Use First

    Avoid overcrowding.

    An attractive fridge needs some breathing room. Leave enough space for cold air to circulate around stored food.

    Keep frequently used items accessible.

    A beautiful arrangement is only useful if you can maintain it. Place everyday ingredients where they are easy to reach.

    Remember, the goal is a fridge that looks organised because it functions well, not one that requires constant rearranging to maintain its appearance.

    7. Label and Store Food Thoughtfully

    Labels can make a significant difference, especially when several people share the same refrigerator.

    They help everyone understand where items belong and reduce the likelihood of food being forgotten.

    For leftovers, label containers with:

    • The name of the food
    • The date it was prepared or stored

    Use transparent, food-safe containers where possible so you can see what is inside.

    You can also transfer suitable foods into containers when doing so makes them easier to store. However, don’t remove original packaging if it contains important storage instructions, expiry information or allergen details.

    Keep food covered, and follow the storage directions on its packaging.

    A simple labelling system is particularly helpful for busy households where groceries are purchased and prepared on different days.

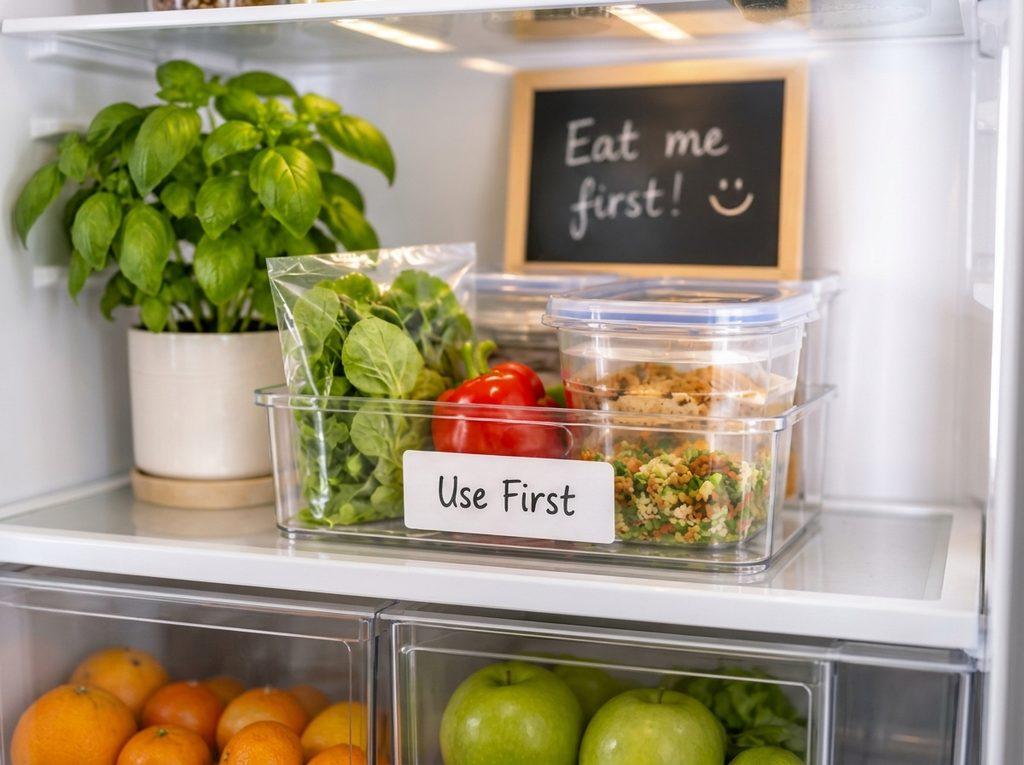
    8. Introduce a ‘Use First’ Section

    One of the best ways to reduce food waste is to make food that needs attention easy to see.

    Create a small designated area for items that should be used before opening newer products.

    This could include:

    • Leftover vegetables
    • Opened food approaching its recommended use date
    • Prepared ingredients
    • Suitable leftovers

    Place the section somewhere visible and check it before planning meals or writing your grocery list.

    The idea is simple: make the food you already have easier to remember.

    This small habit can help prevent unnecessary purchases and make weekly meal planning more practical.

    9. Follow a Five-Minute Weekly Fridge Reset

    Even the best refrigerator organisation system will become messy without a little maintenance.

    Fortunately, you don’t need to spend hours reorganising everything.

    Set aside five to ten minutes before your next grocery shop to:

    1. Check the contents of your refrigerator.
    2. Remove food that is no longer safe to keep.
    3. Wipe up spills.
    4. Move suitable older items towards the front.
    5. Check the use-first section.
    6. Make a shopping list based on what is actually missing.

    Store leftovers in covered, shallow containers and refrigerate them promptly. As a general USDA guideline, refrigerated leftovers should be used within three to four days or frozen for longer storage.

    Try to refrigerate perishable food within two hours of preparation or purchase, and sooner in very hot conditions.

    A regular reset prevents small organisational problems from becoming a full refrigerator makeover every few weeks.

    Budget-Friendly Fridge Organisation: What Should You Buy First?

    If you’re working with a limited budget, resist the temptation to purchase an entire refrigerator organisation kit.

    Start with the items that solve your biggest problems.

    PriorityItemWhy it helps
    1One or two clear binsGroups frequently used foods
    2Food-safe storage containersKeeps leftovers covered and organised
    3Simple labelsMakes food categories easier to identify
    4Refrigerator thermometerHelps monitor safe storage temperature
    5Shelf riserMakes suitable vertical space more useful
    6TurntableImproves access to items at the back

    You can add accessories gradually as your needs become clearer.

    The best investment is not necessarily the most attractive product. It is the one that makes your refrigerator easier to use every day.

    Frequently Asked Questions About Fridge Organisation

    How do I organise a small fridge?

    Start by grouping similar foods together and assigning each category a specific area. Use one or two clear bins, store suitable items vertically where possible and avoid overcrowding. Keep frequently used ingredients accessible and make a little space for food that needs using first.

    What is the best way to organise a refrigerator?

    A practical refrigerator organisation system separates ready-to-eat foods, raw ingredients, dairy products, produce and condiments. Use the available shelves and drawers according to your refrigerator’s design, while keeping raw meat and seafood safely contained to prevent drips and cross-contamination.

    Where should eggs and milk go in the fridge?

    For refrigerated eggs, keeping them in their original carton on an interior shelf helps protect them from temperature fluctuations. Milk is also better kept on an interior shelf rather than in the door. Always follow the storage instructions on the packaging.

    How do I make my fridge look aesthetic on a budget?

    Start with a clean refrigerator, group similar items together, use a few clear containers and choose simple labels. A consistent colour palette and uncluttered shelves can create a coordinated appearance without purchasing expensive accessories.

    How often should I clean and organise my fridge?

    Wipe spills as they happen, check the contents regularly and do a short organisation reset before grocery shopping. Clean the shelves and drawers as needed, following your refrigerator manufacturer’s instructions.

    Do I need matching refrigerator containers?

    No. Matching containers can create a coordinated appearance, but they are not essential. A few practical, food-safe containers that fit your shelves are more useful than an expensive collection that doesn’t suit your refrigerator.

    Final Thoughts: A Better-Organised Fridge Starts With Simple Habits

    An organised refrigerator doesn’t have to be expensive, oversized or perfectly styled.

    It simply needs a system that makes sense for your household.

    Start by cleaning the shelves, grouping similar foods, using the available space wisely and creating a visible area for food that needs using first. Add a few storage accessories only when they solve a real problem.

    Most importantly, choose an arrangement that is easy to maintain.

    Because at The Clever Space Edit, we believe that making more room for living isn’t about buying more things. It’s about making better use of the space you already have.

    Less clutter. More room to live.