Tag: Sustainable Living

Practical lower-waste habits for a more sustainable home.

  • Small-Space Garden Ideas: Beautiful Ways to Bring Nature into Tiny Homes

    A home doesn’t need a sprawling backyard, a sunroom, or even a balcony to enjoy the beauty of nature. Sometimes, the most charming gardens grow in the smallest and most unexpected places.

    An empty windowsill can become a miniature herb garden. An overlooked corner can turn into a lush green retreat. Even a narrow wall can accommodate a beautiful vertical garden that brings life into an otherwise ordinary room.

    The secret to gardening in a small home isn’t finding more floor space. It’s discovering the gardening opportunities hidden in the space you already have.

    Whether you live in a compact apartment, a rental home, a studio, or a tiny house, there are creative ways to introduce greenery without sacrificing valuable living space.

    Here are beautiful, practical, and sometimes unexpected small-space garden ideas that make even the tiniest home feel more connected to nature.

    1. Turn an Ordinary Windowsill into a Miniature Garden

    One of the most overlooked gardening opportunities in a small home is the windowsill.

    Instead of leaving it empty or using it only for decorative objects, transform it into a miniature garden filled with carefully selected plants.

    A sunny kitchen windowsill can accommodate small herb pots containing basil, mint, parsley, or thyme. In a living room, attractive foliage plants can create a peaceful green display.

    For a more interesting arrangement, combine plants of different heights, textures, and leaf shapes. Use matching terracotta pots, small ceramic containers, or recycled glass jars with appropriate drainage arrangements.

    A clever space-saving tip: Arrange smaller plants on a narrow tiered stand to create additional planting levels without occupying more windowsill length.

    Remember to choose plants according to the amount of sunlight your particular window receives.

    2. Create a Vertical Garden on an Empty Wall
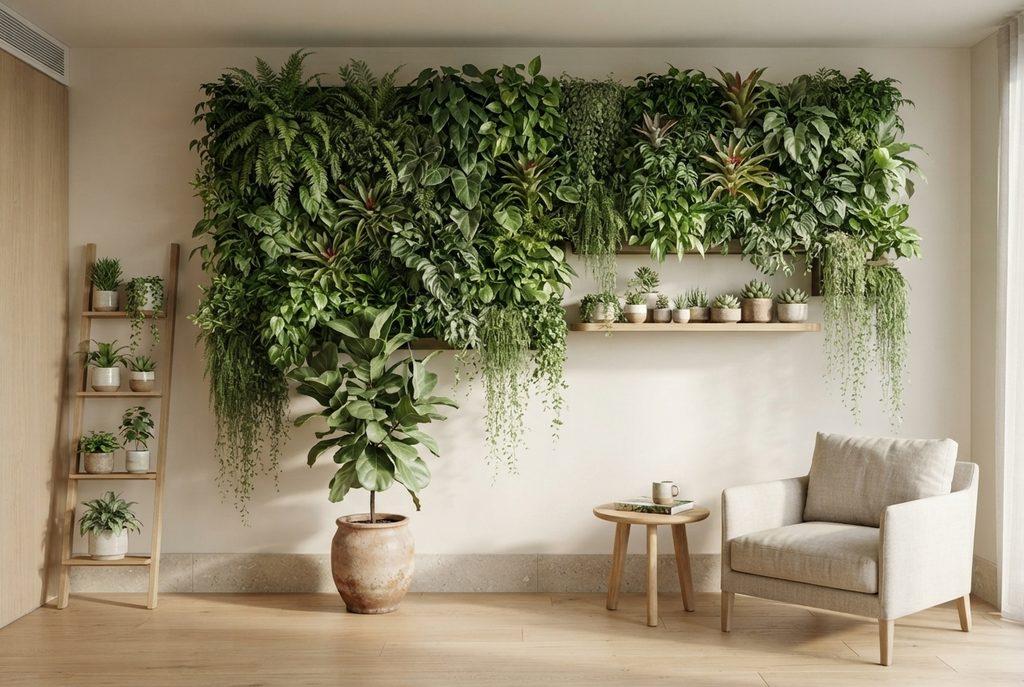
    When floor space is limited, look upwards.

    Vertical gardening is one of the most effective ways to introduce substantial greenery into a compact home without filling every available surface with plant pots.

    An unused kitchen wall, a sheltered balcony wall, or an empty corner can become a beautiful living display.

    Consider:
    – Wall-mounted planters for trailing foliage.
    – Freestanding vertical plant stands.
    – Hanging pocket planters.
    – Narrow shelving arrangements.
    – Modular planters that can be rearranged as your collection grows.

    For a softer appearance, combine plants with different leaf shapes and trailing habits.

    If you rent your home, choose freestanding structures or removable hanging solutions that don’t require permanent alterations.

    The beautiful detail: A vertical garden can become a natural focal point, making a plain wall feel like a carefully designed feature.

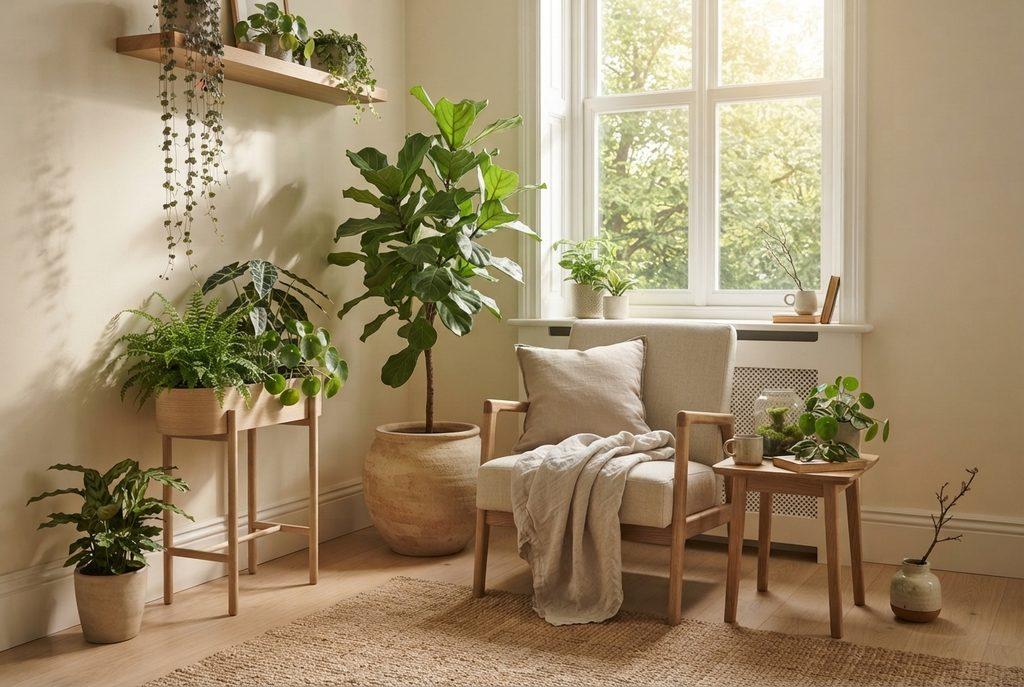
    3. Give an Unused Corner a Garden Makeover

    Every small home seems to have that one awkward corner that never quite serves a purpose.

    Rather than filling it with another storage basket or decorative object, consider turning it into a miniature indoor garden.

    Start with one taller statement plant, then introduce two or three smaller plants at different heights.

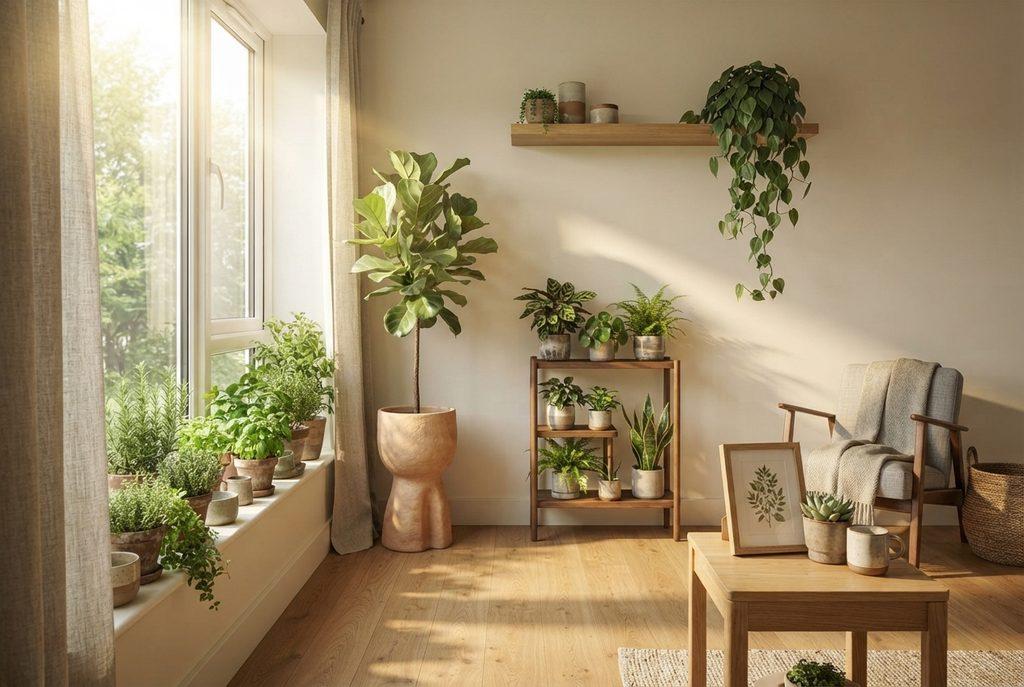
    A narrow plant ladder, tiered stand, or compact wooden shelving unit can help you build an attractive arrangement without spreading plants across the floor.

    For a particularly beautiful effect, combine:
    – One tall architectural plant.
    – A medium-sized leafy plant.
    – A small tabletop plant.
    – A trailing plant positioned on the upper shelf.

    Choose plants with compatible light and watering requirements.

    The result is a little green sanctuary that makes an otherwise forgotten corner feel intentional.

    4. Build a Tiny Kitchen Herb Garden

    A kitchen garden doesn’t have to be an outdoor vegetable patch.

    Even a small kitchen can accommodate a collection of useful herbs, bringing greenery and fresh ingredients closer to your cooking space.

    Consider growing:
    – Basil for sauces and salads.
    – Mint for drinks and cooking.
    – Parsley for everyday meals.
    – Chives for garnishing.
    – Thyme for soups and roasted dishes.

    A narrow shelf near a bright window can hold several small containers. Alternatively, use a compact countertop planter if you have sufficient working space.

    Avoid placing herbs where they will be exposed to excessive heat, steam, or inadequate light.

    A hidden treasure: A small herb garden can be both decorative and functional. It turns ordinary kitchen greenery into something you can actually use.
    5. Transform a Narrow Balcony into a Green Retreat

    A tiny balcony can become one of the most beautiful areas of a compact home.

    The trick is to design vertically and preserve enough open floor space to move comfortably.

    Instead of placing numerous large pots on the ground, combine railing planters, narrow plant stands, and hanging containers where permitted.

    For a layered garden effect, consider:
    – Compact flowering plants.
    – Trailing foliage.
    – Small ornamental grasses.
    – Culinary herbs.
    – A few appropriately sized container plants.

    Add a small folding chair or stool if space allows. A simple outdoor mat and a weather-resistant cushion can complete the look.

    Before adding balcony planters, check building rules, weight limits, and secure mounting requirements.

    Even a narrow balcony can become a lovely place to enjoy a quiet morning surrounded by greenery.

    6. Create a Miniature Garden on a Floating Shelf

    Floating shelves are usually associated with books, photographs, and decorative objects, but they can also accommodate carefully arranged plants.

    A small shelf can support a miniature collection of greenery without taking up valuable furniture or floor space.

    Choose lightweight pots and plants suited to the available light.

    A beautiful arrangement might include a small upright plant, a compact succulent, and a trailing plant that softens the edge of the shelf.

    For a coordinated appearance, use containers in complementary colours such as warm white, terracotta, muted green, and natural stone.

    Make sure the shelf is securely installed and suitable for the combined weight of the containers and their contents.

    7. Bring Nature into the Bathroom

    Bathrooms are often overlooked when planning a small indoor garden.

    However, some bathrooms offer suitable humidity and indirect light for plants that enjoy these conditions.

    Depending on the available light and ventilation, consider plants such as:
    – Boston fern.
    – Certain pothos varieties.
    – Spider plants.
    – Calathea varieties.

    A small plant on a shelf, a hanging planter, or a narrow bathroom ledge can introduce a refreshing natural element.

    If your bathroom has no natural light, don’t assume humidity alone will keep plants healthy. Consider suitable grow lighting or choose another location.

    Keep plants away from areas where they may be knocked over or exposed to cleaning products.

    8. Design a Miniature Terrarium

    One of the most charming ways to enjoy a garden in a tiny home is through a miniature landscape inside a glass container.

    A terrarium can bring together mosses, miniature plants, stones, and natural decorative elements in a surprisingly small footprint.

    It can sit on a desk, coffee table, bookshelf, or bedside surface.

    There are two main styles:

    Closed terrariums: These create a humid environment suitable for selected tropical plants and mosses.

    Open terrariums: These are better suited to plants that prefer drier conditions, such as many succulents and cacti.

    The important detail is selecting plants that thrive in the same environment rather than combining beautiful plants with incompatible needs.

    A thoughtfully designed terrarium can feel like a tiny landscape captured inside a glass world.

    9. Make Use of Hanging Planters

    When every tabletop and floor surface matters, hanging planters offer another opportunity to introduce greenery.

    They are particularly useful near windows, in suitable corners, and on covered balconies.

    Try combining:
    – Macramé hanging planters.
    – Simple ceramic hanging pots.
    – Lightweight woven baskets with suitable plant liners.
    – Wall-mounted hanging arrangements.

    Trailing plants can create a beautiful cascading effect, softening hard edges and introducing movement into the room.

    For rental homes, explore removable or freestanding hanging solutions rather than drilling into ceilings without permission.

    Always check the weight capacity of the hanging support and keep plants away from walkways.

    10. Turn a Small Dining Table into a Living Garden Display

    A small dining table can accommodate a beautiful natural centrepiece without becoming crowded.

    Instead of a large floral arrangement, consider a shallow decorative tray containing two or three miniature plants.

    A small fern, a compact foliage plant, and a decorative pot can create a fresh, understated arrangement.

    For an especially elegant effect, choose containers that complement your dining furniture.

    Keep the arrangement low enough that it doesn’t interfere with conversation or take up too much usable table space.

    This is an easy way to bring nature into a room without introducing another piece of furniture.

    11. Create a Garden on a Narrow Ladder Shelf

    A narrow ladder shelf can become an entire miniature garden in a surprisingly small footprint.

    Its stepped design allows you to display plants at different heights, creating depth without requiring a wide shelving unit.

    Use the lower shelves for heavier containers and the upper shelves for smaller, lighter plants.

    You can also combine greenery with a few natural decorative elements, such as wooden objects, small stones, and neutral ceramic pots.

    For the most harmonious arrangement, avoid overcrowding every shelf. Allow some empty space so that individual plants remain visible.

    This is particularly effective in studio apartments where the same room serves several purposes.

    12. Introduce a Miniature Garden beside Your Work Desk

    A workspace can feel more inviting with a little greenery.

    Rather than placing numerous pots around your desk, choose one or two compact plants that suit the available light.

    A small foliage plant, a miniature succulent arrangement, or a compact herb pot can introduce a natural touch without taking over your working surface.

    If desk space is particularly limited, consider a small freestanding shelf positioned nearby.

    The idea is to create a pleasant visual connection with nature while keeping your workspace organised and functional.

    13. Create a Recycled Container Garden

    Beautiful gardening doesn’t always require expensive pots and accessories.

    A little creativity can turn suitable household containers into attractive plant displays.

    Consider repurposing:
    – Small ceramic bowls.
    – Wooden crates.
    – Tin containers.
    – Old teacups.
    – Glass vessels.
    – Woven baskets with waterproof liners.

    The most important consideration is drainage and plant suitability.

    Containers without drainage holes require careful watering or an appropriate inner planting pot to prevent waterlogging.

    For a cohesive appearance, group containers with similar colours or finishes rather than using too many unrelated styles.

    This is a lovely way to create a personalised garden while making use of items you already own.

    14. Design a Tiny Garden Using a Plant Stand

    Sometimes the simplest solution is the most beautiful.

    A compact plant stand can gather several plants into one organised display, making it easier to maintain a small collection without scattering containers throughout the home.

    Choose a slim design that fits beside a sofa, near a window, or in an unused corner.

    Consider combining plants with different shapes and heights while ensuring each receives the appropriate amount of light.

    A wooden or metal stand can also complement your existing home decor.

    For renters, freestanding plant stands are especially useful because they can be moved when rearranging furniture or changing homes.

    15. Create a Miniature Outdoor Garden on a Window-Side Ledge

    If your home has an exterior windowsill or a suitable sheltered ledge, you may be able to create a tiny outdoor garden.

    Small containers can accommodate flowering plants, compact herbs, or seasonal greenery.

    Choose varieties appropriate for your climate, sun exposure, and wind conditions.

    Before placing anything outside, check building regulations, ledge stability, and the risk of containers falling.

    A small collection of thoughtfully selected plants can transform an ordinary window into a beautiful green feature.

    How to Make a Small Garden Look Beautiful Without Creating Clutter

    The secret to a successful small-space garden is not how many plants you can fit into a room. It is how thoughtfully you arrange them.

    Here are a few design principles worth remembering.

    1. Choose a consistent container style.

    Use two or three complementary finishes rather than a collection of unrelated pots. Terracotta, natural wood, and neutral ceramics work particularly well together.

    2. Mix plant heights.

    Combine upright, compact, and trailing plants to create visual interest without requiring additional floor space.

    3. Respect natural light.

    Before buying plants, observe how much sunlight each area receives. Match plants to their environment rather than forcing them into unsuitable locations.

    4. Leave room to breathe.

    A few well-positioned plants can be more effective than filling every available surface.

    5. Think beyond the floor.

    Windowsills, shelves, walls, hanging spaces, and narrow corners all offer opportunities.

    6. Choose plants you can realistically maintain.

    Consider your watering routine, available light, ventilation, and travel schedule before expanding your collection.

    Small-Space Gardening: What to Avoid

    A beautiful miniature garden should make your home more enjoyable, not create additional problems.

    Avoid these common mistakes:
    – Buying plants before assessing the available light.
    – Overcrowding windowsills and shelves.
    – Choosing containers without considering drainage.
    – Placing heavy pots on unsuitable shelves.
    – Using hanging arrangements that obstruct movement.
    – Combining plants with very different watering requirements.
    – Ignoring ventilation and moisture issues.
    – Choosing large plants that overwhelm the available space.

    A smaller, carefully planned collection is often easier to maintain and more visually appealing.

    Final Thoughts: Your Small Home Can Still Have a Garden

    A garden is not defined by its size. It is defined by the life, beauty, and sense of connection with nature that it brings into a space.

    Whether you transform an ordinary windowsill, create a miniature terrarium, introduce a vertical garden, or fill an overlooked corner with greenery, there are countless ways to make a small home feel more alive.

    Start with one little space. Choose a few suitable plants, experiment with their arrangement, and gradually build a green corner that feels like yours.

    You may discover that the most beautiful garden you have ever created doesn’t need a backyard at all.

    The Clever Space Edit – Less clutter. More room to live.

  • Natural Bathroom Cleaning Hacks: Say Goodbye to Harsh Odors and Grime

    Natural Bathroom Cleaning Hacks: Say Goodbye to Harsh Odors and Grime

    A bathroom can look clean at first glance and still have areas that need attention. Soap residue collects around taps, moisture settles into corners, shower screens develop cloudy marks, and unpleasant smells sometimes linger even after the floor has been washed.

    The secret to maintaining a fresher bathroom isn’t necessarily buying more cleaning products. It is understanding where dirt accumulates, choosing suitable cleaning methods, and developing small habits that prevent everyday problems from becoming bigger jobs.

    Whether you have a compact apartment bathroom, a shared family bathroom, or a rental with limited storage, these practical natural bathroom cleaning hacks can help you maintain a cleaner, more comfortable space.

    1. Start with the Forgotten Bathroom Zones

    One reason bathrooms become difficult to maintain is that cleaning often concentrates on the obvious areas: the toilet, sink, and floor.

    However, several less noticeable places deserve regular attention.

    Check:
    – The underside of the sink and tap fittings.
    – The edges of the shower screen.
    – The base of the toilet.
    – The corners behind the bathroom door.
    – The handles of cupboards and drawers.
    – The ventilation grille.
    – The joints around fixtures.
    – The area beneath bathroom storage baskets.

    The Clever Space method: Instead of cleaning the entire bathroom randomly, divide it into zones. Complete one zone before moving to the next. This reduces forgotten areas and makes maintenance easier.

    Illustration 1: A beautiful editorial photograph of a bright bathroom with small numbered callouts highlighting overlooked cleaning zones.

    2. Remove Soap Residue from Shower Areas

    Soap residue can accumulate on shower screens, tiles, and taps. Combined with minerals in hard water, it can create cloudy deposits that make surfaces look dull.

    For compatible surfaces:
    1. Begin by rinsing away loose dirt.
    2. Apply a suitable bathroom cleaner according to its instructions.
    3. Allow the recommended contact time.
    4. Use a soft cloth or non-scratch sponge.
    5. Rinse thoroughly.
    6. Dry the surface with a clean microfibre cloth.

    For suitable glass surfaces, an appropriately diluted vinegar solution may help with mineral deposits. However, do not use vinegar on natural stone, sensitive finishes, or surfaces whose manufacturer advises against acidic cleaners.

    3. Give Bathroom Drains Some Attention

    Bathroom drains collect hair, soap residue, and other everyday debris. When these materials accumulate, water may drain slowly and unpleasant smells can develop.

    A simple maintenance routine is more useful than relying on homemade mixtures.
    – Remove visible hair and debris using a suitable drain-cleaning tool.
    – Clean the drain cover separately.
    – Rinse the surrounding area.
    – Follow the drain manufacturer’s maintenance instructions.
    – If water continues to drain slowly, investigate the blockage rather than repeatedly pouring mixtures into the drain.

    Avoid mixing commercial drain cleaners with vinegar, bleach, or other cleaning products. Never put your hands into a drain to retrieve debris.

    4. Keep Bathroom Mirrors Clear

    A mirror covered in water spots and fingerprints can make an otherwise tidy bathroom look neglected.

    For routine mirror maintenance:
    1. Remove loose dust with a dry microfibre cloth.
    2. Use a glass cleaner suitable for mirrors.
    3. Apply the cleaner to the cloth rather than soaking the mirror edges.
    4. Wipe gently.
    5. Buff with a clean, dry cloth.

    Avoid allowing excess liquid to run behind the mirror, where it may damage its backing.

    5. Prevent Persistent Bathroom Odors

    A bathroom that smells unpleasant may have an underlying moisture, drainage, or ventilation problem.

    Rather than covering the smell with fragrance, identify its source.

    Check the following:

    Damp towels: Towels that remain wet for long periods can develop unpleasant odors. Hang them fully open and allow them to dry between uses.

    Wet bath mats: Wash bath mats regularly according to their care labels and allow them to dry completely.

    Bathroom bins: Empty bins frequently, clean them when necessary, and ensure they dry before replacing liners.

    Drains: Persistent smells may indicate a drainage or plumbing issue.

    Ventilation: Use an exhaust fan or open a suitable window when possible, especially after showers.

    If an odor resembles sewage or persists despite routine cleaning, seek help from a qualified plumber. A damaged seal, blocked vent, or plumbing fault may be responsible.

    Illustration 2: An airy bathroom with an open window, neatly hung towels, a dry bath mat, and fresh greenery, communicating ventilation and moisture control.

    6. Deal with Hard-Water Marks Carefully

    Hard water contains dissolved minerals that can leave white deposits on taps, showerheads, and glass.

    The correct cleaning method depends on the material.

    For suitable chrome fixtures and compatible glass:
    – Use a manufacturer-approved descaling cleaner or appropriately diluted vinegar.
    – Follow the recommended contact time.
    – Rinse thoroughly.
    – Dry with a soft cloth.

    Do not use acidic cleaners on marble, limestone, travertine, or other acid-sensitive materials.

    For a showerhead, check whether the manufacturer permits soaking or recommends another descaling method.

    7. Clean Grout Without Damaging It

    Grout can collect dirt and discolour over time, particularly in areas exposed to frequent moisture.

    A careful approach is best:
    1. Identify the grout type and check the tile manufacturer’s cleaning recommendations.
    2. Use a suitable grout cleaner.
    3. Apply it according to the label.
    4. Gently scrub with a soft grout brush.
    5. Rinse and dry the area.

    Avoid aggressive scrubbing that could damage grout or surrounding finishes.

    If grout remains persistently discoloured, damaged, or mouldy, professional assessment may be necessary.

    8. Establish a Five-Minute Bathroom Maintenance Habit

    You do not need a long cleaning session every day to keep your bathroom manageable.

    Try this short routine:
    – Wipe the sink after use.
    – Hang towels properly.
    – Remove visible hair from suitable surfaces.
    – Put toiletries back in their designated places.
    – Keep the floor as dry as practical.
    – Check that the bathroom has adequate ventilation.

    These small actions reduce the amount of work required during the weekly clean.

    9. Create a Bathroom Cleaning Basket

    A compact cleaning basket can make bathroom maintenance easier, particularly in homes with limited cupboard space.

    Consider keeping:
    – Two dedicated microfibre cloths.
    – A soft cleaning brush.
    – A suitable bathroom cleaner.
    – A glass-cleaning cloth.
    – A small rubbish-bag supply.
    – Cleaning gloves where appropriate.

    Store cleaning products in their original containers and follow their safety and storage instructions. Keep them away from children and pets.

    A Simple Bathroom Cleaning Schedule

    Frequency Cleaning task
    Daily Wipe sink, hang towels, tidy toiletries
    Twice weekly Clean toilet and frequently touched surfaces
    Weekly Clean shower, bath, mirror, and floor
    Monthly Check drains, ventilation, and overlooked corners
    As needed Address limescale, grout, and plumbing issues

    Adjust the schedule according to household size and bathroom use.

    Frequently Asked Questions

    What is the best natural way to clean a bathroom?
    Start with suitable reusable cloths, a mild cleaner, and a soft brush. Choose products according to the material being cleaned rather than assuming one homemade solution works everywhere.

    How can I make my bathroom smell fresh naturally?
    Improve ventilation, dry towels and bath mats properly, empty the bin, and investigate persistent drain odours. Removing the source of the smell is more effective than covering it with fragrance.

    Can vinegar clean bathroom tiles?
    It depends on the tile material. Vinegar may be suitable for some ceramic surfaces, but it can damage natural stone and certain finishes. Always check manufacturer recommendations.

    How often should I clean my bathroom?
    Light maintenance can be done daily, while more thorough cleaning is usually needed weekly. Adjust the frequency according to usage and moisture levels.

    How do I keep a small bathroom clean?
    Use a compact cleaning basket, return toiletries to designated places, wipe surfaces regularly, and avoid storing unnecessary products.

    Final Thoughts

    A fresher bathroom is often the result of consistent maintenance rather than an overflowing collection of cleaning products.

    Pay attention to forgotten corners, manage moisture, clean suitable surfaces carefully, and address persistent odors at their source.

    With a few practical habits, even a small bathroom can feel more comfortable, organised, and inviting.

    The Clever Space Edit – Less clutter. More room to live.

    Related reading: 7 Essential Natural Cleaning Supplies for a Greener Home; DIY Natural Bathroom Cleaning: Simple Homemade Solutions That Work.

  • 7 Essential Natural Cleaning Supplies for a Greener Home

    Creating a cleaner home doesn’t have to mean filling your cupboards with dozens of specialised products. Sometimes, the most practical approach is to start with a few versatile supplies that help you clean everyday surfaces, reduce disposable waste and keep your household routine simple.

    Whether you live in a small apartment, rent your home or simply want to make more thoughtful household choices, building a basic collection of natural cleaning supplies can be a useful first step.

    The goal isn’t to replace every cleaning product overnight. It’s to understand what you actually need, choose products carefully and avoid buying items that perform the same job.

    Here are seven practical essentials to consider when putting together a greener home cleaning kit.

    1. Microfibre Cleaning Cloths

    Microfibre cloths are among the most versatile items in a household cleaning kit. They can be used for dusting, wiping surfaces, cleaning mirrors and removing everyday marks.

    Unlike disposable paper towels, reusable cloths can be washed and used repeatedly.

    Why they’re useful:

    • Suitable for many everyday cleaning tasks.
    • Help reduce reliance on disposable wipes and paper towels.
    • Available in different sizes and textures.
    • Can often be used with water for light cleaning.

    Clever Space tip: Keep separate cloths for kitchen surfaces, bathrooms and general dusting. Wash them regularly according to their care instructions.

    2. Baking Soda

    Baking soda is a familiar household ingredient that can help with certain cleaning jobs.

    Its mild abrasive properties make it useful for tackling some surface marks and residue when used appropriately.

    Where it can be useful:

    • Cleaning suitable kitchen sinks.
    • Freshening washable rubbish bins.
    • Removing some everyday marks from compatible surfaces.
    • Helping clean certain household containers.

    How to use it: Sprinkle a small amount onto a damp cloth or compatible surface, gently work it over the area and rinse thoroughly.

    Avoid using it on delicate finishes or surfaces that scratch easily. Test an inconspicuous area first.

    3. White Vinegar

    White vinegar is commonly used in household cleaning because its acidity can help dissolve some mineral deposits and soap residue.

    It can be useful for selected jobs, but it isn’t suitable for every surface.

    Potential uses include:

    • Removing some hard-water deposits from compatible fixtures.
    • Cleaning certain glass surfaces.
    • Helping with selected laundry-related odours.

    Important: Do not use vinegar on natural stone such as marble or limestone. Avoid using it on surfaces whose manufacturers advise against acidic cleaners, including some wood finishes.

    Vinegar is not a disinfectant and should not be relied upon to eliminate harmful germs.

    4. Mild Dishwashing Liquid

    A small bottle of ordinary dishwashing liquid can be one of the most useful products in a basic cleaning cupboard.

    Its cleaning agents help loosen grease and everyday food residue.

    Useful applications:

    • Washing dishes.
    • Cleaning washable kitchen surfaces.
    • Removing grease from compatible items.
    • Washing certain household tools and accessories.

    Choose a product with clear instructions and a formula suited to your household needs.

    A little often goes a long way. Using more product than necessary doesn’t automatically produce a better cleaning result.

    5. A Soft-Bristle Scrubbing Brush

    A reusable scrubbing brush can make cleaning awkward corners and textured surfaces easier.

    Look for a comfortable handle, durable bristles and a size that fits your storage space.

    Where it can help:

    • Cleaning grout on compatible tiled surfaces.
    • Scrubbing suitable sink surfaces.
    • Cleaning washable household tools.
    • Reaching corners and edges that cloths may miss.

    Choose the brush according to the surface. Hard bristles can scratch delicate materials, so always check compatibility first.

    6. Reusable Spray Bottles

    Reusable spray bottles can help organise your cleaning supplies and reduce the need to purchase new disposable containers.

    They are particularly useful when you use ready-made cleaning products that are suitable for transfer into another container.

    A few practical considerations:

    • Choose a durable, refillable bottle.
    • Label the contents clearly.
    • Follow the original product’s storage and transfer instructions.
    • Never reuse food or drink containers for cleaning products.
    • Keep all cleaning supplies securely stored and away from children and pets.

    Do not combine different cleaning products in a spray bottle. A mixture that looks harmless may still produce an unsafe reaction.

    7. A Reusable Mop and Cleaning Bucket

    For households with tiled or other washable floors, a reusable mop and bucket can make regular floor cleaning easier.

    Instead of purchasing disposable floor-cleaning pads repeatedly, choose a mop with a washable head that can be maintained and reused.

    What to look for:

    • A removable, washable mop head.
    • A compact design for smaller homes.
    • A handle that is comfortable to use.
    • Materials that are durable and easy to maintain.

    Always use a floor-cleaning product suitable for your flooring. Some wood, laminate and stone floors require specific care.

    How to Build a Natural Cleaning Kit Without Overspending

    You don’t need to purchase all seven supplies at once.

    Start by checking what you already own. You may already have reusable cloths, a dishwashing liquid and a suitable brush.

    Use this simple approach:

    Step 1: Identify your regular cleaning tasks.

    Think about the surfaces you clean most frequently. A small apartment with tiled floors may need a different selection of tools from a home with extensive carpeting.

    Step 2: Purchase versatile essentials first.

    Prioritise reusable cloths, a suitable cleaning liquid and a brush before buying specialised products.

    Step 3: Choose refillable options where practical.

    Consider products sold in refill packs or larger containers when they offer good value and can be stored safely.

    Step 4: Avoid duplicate products.

    Before buying another cleaner, check whether you already own something suitable for that particular task.

    Step 5: Store everything in one organised place.

    A small basket, cupboard shelf or storage caddy can keep your supplies together without occupying valuable space.

    What About Products Marketed as Natural or Eco-Friendly?

    One important thing to remember is that the words natural, green and eco-friendly do not automatically guarantee that a cleaning product is harmless.

    Look beyond the marketing on the front of the packaging.

    Consider:

    • The ingredient information available.
    • Product warnings and instructions.
    • Whether the packaging can be refilled or recycled locally.
    • Whether the product is suitable for the intended surface.
    • Whether an independent certification is available.

    For readers who want additional guidance, the US Environmental Protection Agency’s Safer Choice programme provides information about products assessed against its ingredient and performance standards.

    Cleaning Safety: What You Should Never Mix

    Homemade cleaning recipes are popular, but combining household ingredients without understanding their properties can be dangerous.

    Keep these precautions in mind:

    • Never mix bleach with vinegar.
    • Never mix bleach with ammonia-containing products.
    • Never combine different commercial cleaners.
    • Do not assume that combining baking soda and vinegar produces a more powerful cleaner.
    • Follow product labels and manufacturer instructions.
    • Ventilate rooms appropriately when cleaning.

    Baking soda and vinegar react with each other and largely neutralise one another. They are generally more useful for appropriate separate cleaning tasks than as a universal combined cleaner.

    A Simple Weekly Cleaning Kit Checklist

    Use this checklist when organising your household supplies:

    • Reusable microfibre cloths
    • Baking soda
    • White vinegar for compatible surfaces
    • Mild dishwashing liquid
    • Soft-bristle cleaning brush
    • Reusable, clearly labelled spray bottle
    • Reusable mop and bucket

    You can save this list and use it when shopping or organising your cleaning cupboard.

    Frequently Asked Questions

    What are the most important natural cleaning supplies to have at home?

    Start with reusable cloths, a suitable dishwashing liquid, a soft cleaning brush and a few versatile supplies such as baking soda. Add other items according to the surfaces and cleaning tasks in your home.

    Can vinegar be used to clean everything?

    No. Vinegar is acidic and can damage natural stone and certain finishes. It is also not a disinfectant. Always check surface-care instructions before using it.

    Are natural cleaning products safer than commercial cleaners?

    Not necessarily. Safety depends on the ingredients, concentration, exposure and how the product is used. Read labels rather than relying on marketing claims.

    How can I make my cleaning routine more environmentally conscious?

    Use reusable tools, avoid unnecessary purchases, select refillable products where practical and follow recommended product quantities. Reducing waste is often a useful place to start.

    Do I need expensive eco-friendly cleaning products?

    No. You can begin by making better use of suitable supplies you already own. When purchasing new products, compare their ingredients, packaging, performance and value.

    Final Thoughts: Start Small and Clean Smarter

    A greener home doesn’t require a complete cupboard makeover or an expensive collection of specialised products.

    Start with versatile essentials, choose reusable tools, understand the surfaces in your home and buy only what you genuinely need.

    The best cleaning kit is one that fits your household, makes everyday tasks easier and doesn’t create unnecessary clutter.

    At The Clever Space Edit, we believe that thoughtful choices can make a home easier to maintain, more organised and more enjoyable to live in.

    Less clutter. More room to live.

  • Create a Home Repair and Reuse Corner: The Small Space That Can Save You Money and Reduce Waste

    Create a Home Repair and Reuse Corner: The Small Space That Can Save You Money and Reduce Waste

    A loose button, a wobbly chair or a bag with a broken strap can seem too minor to address immediately. Without a convenient place to repair them, useful items often end up in a cupboard or rubbish bag.

    A home repair and reuse corner does not need to be a workshop. A shelf, drawer, portable box or small desk area can make repairing something easier than forgetting about it.

    1. Choose a space that encourages action

    Choose a dry, well-ventilated location accessible to the adults responsible for maintenance. Keep it away from food preparation areas, young children and pets. If space is limited, use a portable container.

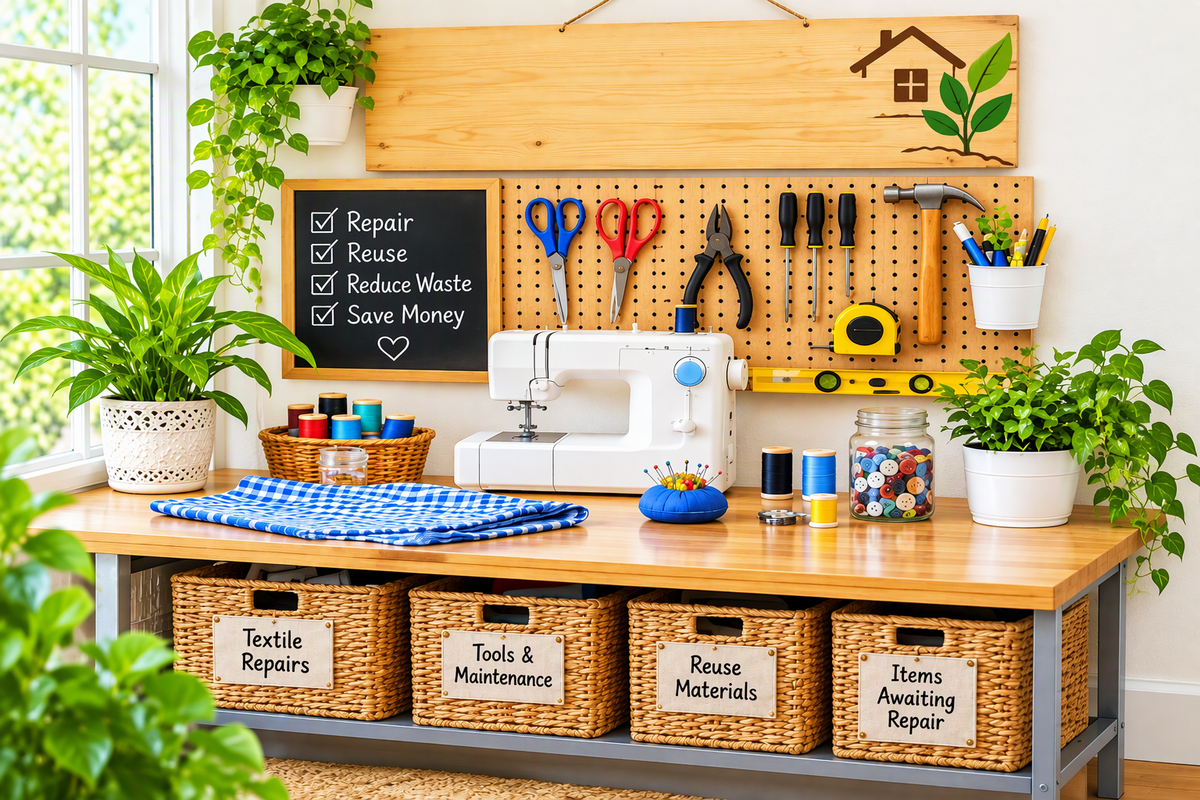
    2. Divide the station into four sections

    Clothing and textile repairs

    Keep needles, common thread colours, spare buttons, small patches, scissors and a measuring tape together for loose buttons and minor seam repairs.

    Household maintenance

    Depending on your needs, keep a measuring tape, household notebook, suitable cleaning cloths, approved care materials and basic hand tools. Electrical, structural and plumbing work should be handled by qualified professionals when appropriate.

    Reuse materials

    Store clean fabric remnants, suitable ribbons, spare buttons, clean jars and reusable packaging, but set a strict limit on the amount you keep.

    Items awaiting repair

    Create a small container for things that need attention. Add a note describing the problem, then review the container regularly. If something remains there for months, decide whether repair, donation or responsible recycling is appropriate.

    3. Introduce the five-minute repair habit

    When you notice a minor problem, ask whether it can be repaired safely, whether you have suitable supplies, whether you can complete the job correctly and whether professional repair is more suitable. Never attempt unsafe electrical work, gas-appliance repairs or structural repairs without qualified help.

    4. Keep a repair record

    Record what was repaired, when it was repaired, what was needed and whether it worked. Patterns can reveal that an item needs better maintenance or replacement with a more durable alternative.

    Quick Repair Checklist beside a repair log notebook, tools mug, plant and wooden house ornament

    5. Give household items a second life

    A damaged cotton garment might provide fabric for a small repair. Unused buttons can rescue a favourite shirt. A sturdy container can hold repair materials, and a suitable towel can become a cleaning cloth. The distinction is between genuine reuse and keeping things without purpose.

    Folded fabrics in a wooden crate beside a jar of buttons and a sign encouraging items to get a second life

    6. Create a monthly review

    Ask which items have been repaired, which need professional attention, which supplies you keep buying unnecessarily and whether anything stored in the station is no longer useful.

    Starter checklist

    • Choose a safe storage area.
    • Gather existing suitable supplies.
    • Separate textile repairs from maintenance.
    • Create a reuse-material section.
    • Establish an awaiting-repair container.
    • Keep an inventory.
    • Review the station monthly.

    Frequently asked questions

    What should a basic home repair kit contain?

    Suitable basic supplies may include measuring equipment, textile repair materials, cleaning cloths and simple hand tools.

    How does repairing reduce waste?

    Repairing suitable belongings can extend their useful life and reduce the need to discard and replace them.

    How much space is needed?

    A small shelf, drawer or portable container can be sufficient.

    A well-organised home is not one where nothing breaks. It is one where small problems do not automatically become reasons to throw useful things away.

  • Responsible Home Decluttering: A Donation and Reuse System

    Responsible Home Decluttering: A Donation and Reuse System

    Decluttering should not simply move the problem somewhere else. A room may look better, but the items may have been pushed into another cupboard, garage or storage space. Responsible home decluttering asks not only what you want to remove, but where each item should go next. For more practical ideas, see our no-buy home reset.

    1. Give Every Item a Better Next Step

    Establish five destinations: keep and use, repair, give away, sell or exchange, and recycle or dispose of responsibly.

    Keep What Supports Your Life

    Keep belongings that genuinely support your household, and store them where they are likely to be used.

    Repair Before Replacing

    A missing button or loose handle may be repairable, but do not keep unsafe or extensively damaged items simply because you hope to fix them someday.

    Give Useful Items a New Home

    Suitable belongings may help a relative, neighbour, community organisation or someone setting up a home. Ask first instead of assuming someone needs an item.

    Sell, Swap or Exchange with Care

    Items in good condition may have resale or exchange value. Be honest about their condition and functionality.

    Recycle and Dispose Responsibly

    Check what local services accept, using appropriate arrangements for electronics, batteries and other special waste.

    2. Build a Household Rehoming Station

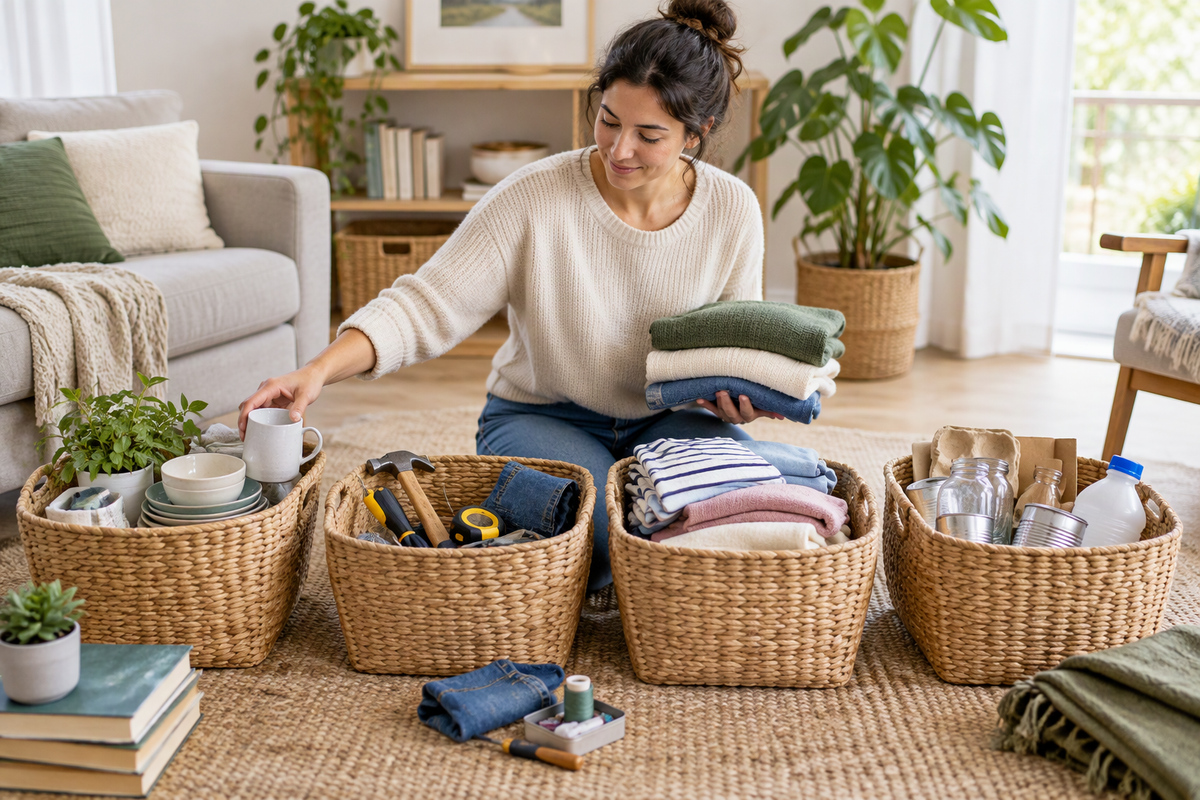
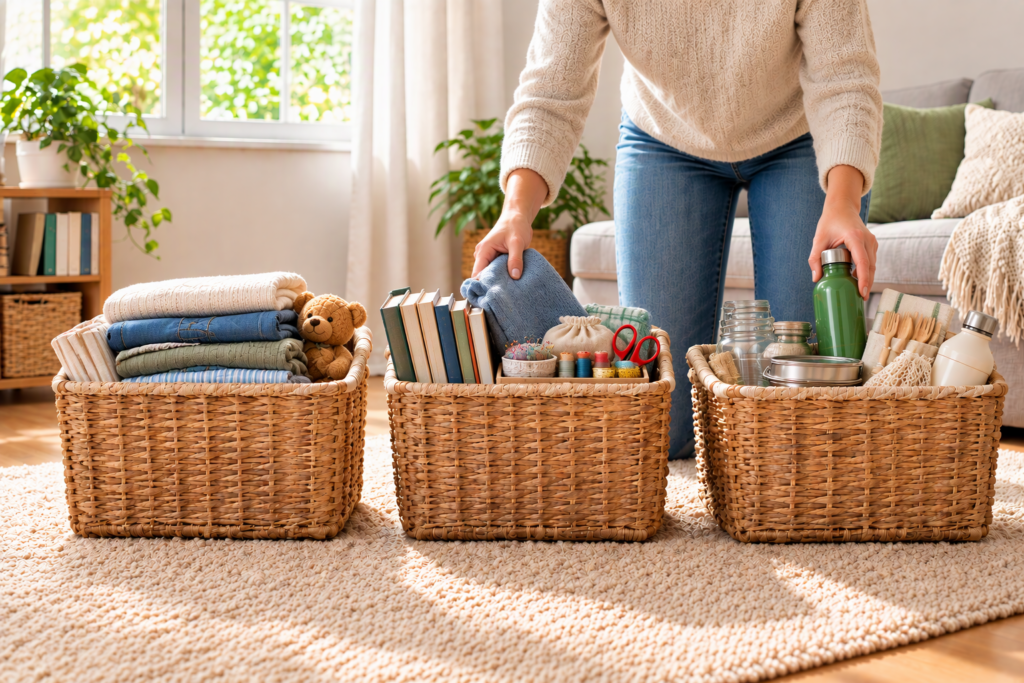
    Choose a small temporary location for items awaiting their next destination. Use separate sections for clothing and textiles, books and stationery, kitchen goods, repairable belongings and items awaiting collection. Keep the station small and set a collection date. If you are preparing for a move, our guide to moving house with less waste offers additional reuse ideas.

    Household rehoming station with labelled baskets for donate, share and give away, hanging clothes, blankets, books and plants

    Create a Home Repair and Reuse Corner

    Create a small repair-and-reuse corner near your rehoming station. Keep a basic toolkit, reusable containers for screws and small parts, a notebook for repair notes, and materials such as spare buttons, cord, fabric or suitable packaging. Label the area clearly and review it regularly so it supports practical repairs rather than becoming another storage pile.

    Only keep repair supplies that are safe and genuinely useful. For electrical items, use appropriate caution and seek qualified help when a repair is beyond your experience.

    3. Find the Right New Home for Each Item

    Before offering an item, ask whether it is clean, complete, working, safe and accepted by the intended organisation. The goal is to offer something useful rather than transfer a disposal problem.

    4. Give Your Rehoming Plan a Seven-Day Deadline

    Once an item enters the rehoming station, give it a specific destination and arrange the next step within seven days where practical. If nobody wants it, reconsider its destination rather than keeping it indefinitely.

    5. Turn Responsible Decluttering into a Habit

    A short monthly review can identify unused clothing, duplicate equipment, books, accessories, broken items and reusable materials before they accumulate. For another way to find useful storage opportunities, read 12 ideas for forgotten spaces in your home.

    Organised household rehoming station with baskets for clothing, books, sewing supplies and reusable household items

    6. Start a Household Exchange Tradition

    Friends, neighbours or relatives can exchange books, clean household accessories, suitable clothing, decorative items, kitchen equipment or gardening supplies. Set simple rules about cleanliness, condition and suitability.

    7. Track What Leaves Your Home

    Record what is donated, sold, repaired, exchanged or recycled. This can reveal repeated purchases and help you make more thoughtful decisions.

    Responsible Decluttering Checklist

    • Is the item still useful?
    • Can it be repaired?
    • Would someone genuinely benefit?
    • Is it clean and safe to pass on?
    • Have you identified a suitable recipient?
    • Is there an appropriate recycling route?
    • Have you arranged collection or delivery?

    Questions About Responsible Decluttering

    What is the most responsible way to declutter?

    Prioritise continued use, repair, reuse and suitable donation before recycling or disposal.

    Where can I donate household items?

    Look for reputable local charities, community organisations, schools and donation programmes, and confirm their needs first.

    Should broken items be donated?

    Only when the receiving organisation specifically accepts repairable items. Never pass on unsafe or unusable products as ordinary donations.

    How often should I declutter?

    A short monthly review can prevent belongings from accumulating, supported by larger seasonal reviews.

    The end of an item’s usefulness in your home does not always have to be the end of its useful life. A thoughtful system helps useful things find somewhere they are needed.